Podge: There was this one hair that wouldn’t go straight so I thought I’d just trim it off. But then that made these other hairs look funny, so I trimmed them too. That made my whole tail all uneven, so I cut a little more… But it doesn’t look that bad, right?
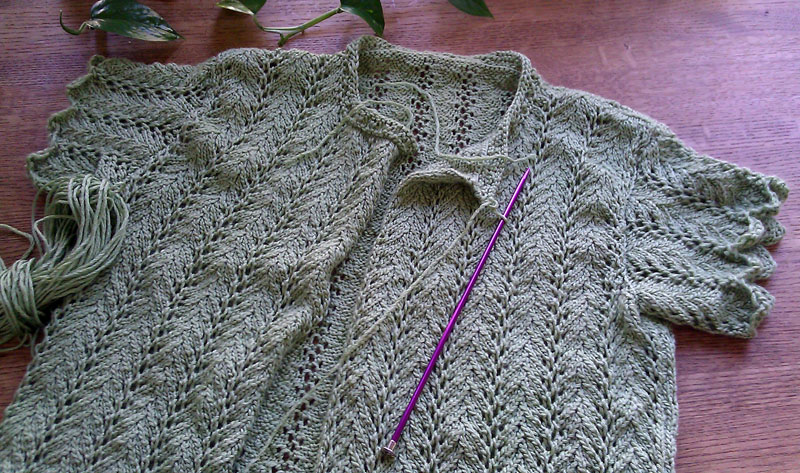
The only other moment that can compare is when on the first day that you wear it, you get to tell someone, “I made this!” I still have loose threads to weave in and super-cute flower buttons to sew on and, of course, spring has to arrive… But when it does, I’ll be sure to share a photo with you of its first day in action.
Pantone chose emerald green, but my color of the year is lemon zest, a light yet vibrant and fresh color to accent all the carefree moments and exciting surprises I feel this year has in store.
In 2013, we will wear photo prints. And I’d like to take this one step further: wouldn’t it be awesome if someone developed a website for people to order fabric or even garments printed with their own photos? If this already exists, please let me know!
Jewelry design will be lighthearted and nostalgic. We will wear lacy, airy pendants, brooches, and bracelets; barely there fine metal chains; and simple pieces in single colors and geometric shapes.
First came Ravelry, then came Craftsy. In 2013, someone will create a website where crafters can actually teach each other in real time.
We will want more handmade goods. You’ve all heard of Etsy, but other sites like Fab, Dawanda, Folksy, and icraft.ca will gain in popularity this year.
Food trucks will team up to create food trains.
We will wear socks so bright and playful that it’ll become standard to wear them knee-high with sandals just to show them off.
This scarf is the answer for those of us who want to give a handmade gift but are running out of time to make something really special. Bulky yarn, large knitting needles, and a very easy stitch allow for this scarf to be whipped up in under 3 hours (at least that’s how long it took me and I’m not a very fast knitter).
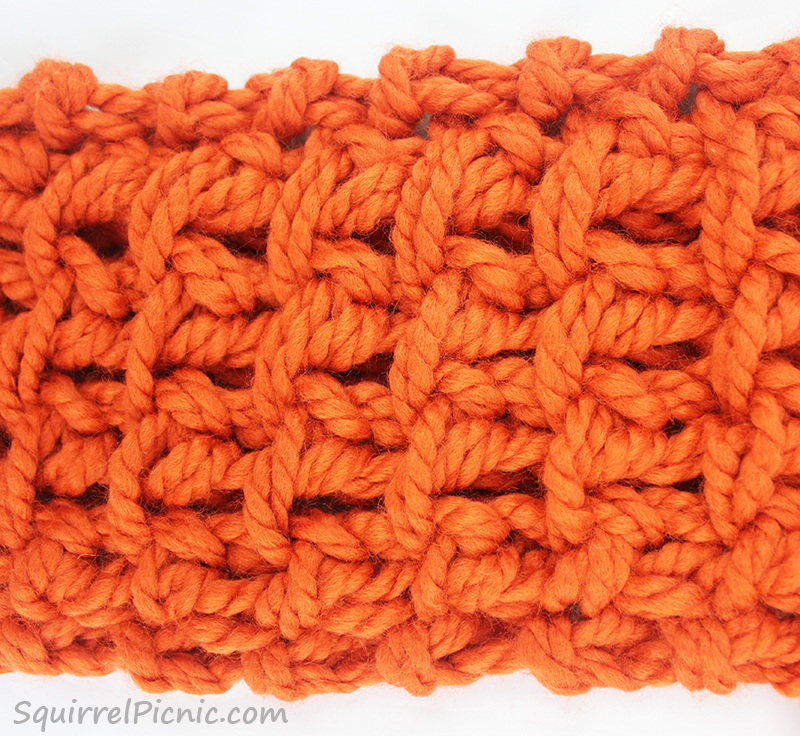
What makes this pattern special, though, is that it creates a fun, unique texture that looks intricate. The lucky person who receives this scarf will never suspect you knit it in an afternoon.
Super Comfy, Super Quick Knit Scarf
For this pattern you will need to know basic knitting stitches, including how to do a basic knit cast on, knit a stitch, yarn over, pass a stitch, and bind off. For your convenience, I’ve provided a step-by-step photo tutorial, with links to additional video resources, below the pattern. Enjoy!
Finished Size: 6 inches x 76 inches
Materials
Bernat Roving bulky yarn in Cranberry,
80% acrylic, 20% wool, 3.5 oz (100 g)/120 yds (109 m): 2 balls
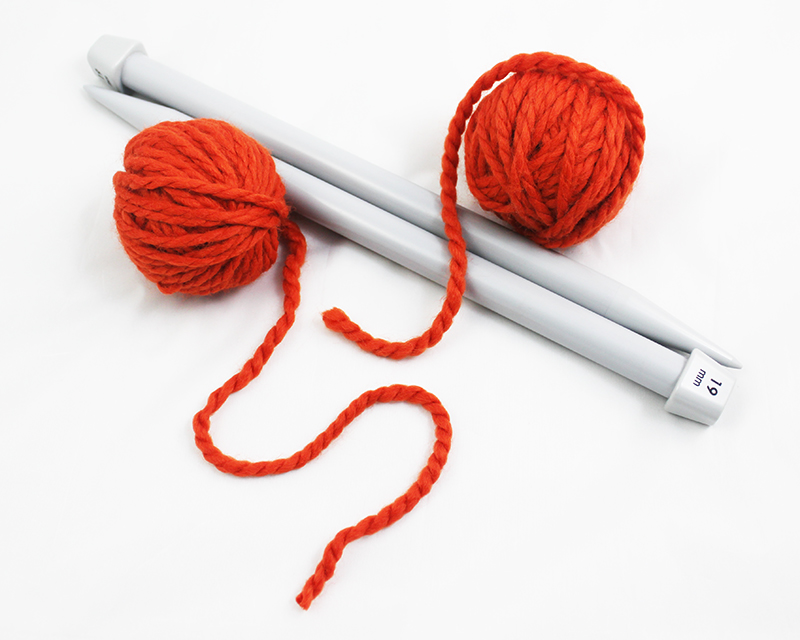
Size 35 (19 mm) knitting needles
Note: The yarn is doubled throughout this pattern.
Directions
CO 10 stitches.
Row 1: k1, *yo, k2, pass the yarn over st over both knit sts, repeat from * across to last st, k1.
Repeat row 1 for every row.
BO loosely and weave in ends.
Here’s a tutorial to help you complete your scarf.
You will need 2 balls of yarn for this project. (Unlike the balls of yarn pictured here, you will use full balls of yarn. See materials above.) You will also need a set of size 35 (19 mm) knitting needles.
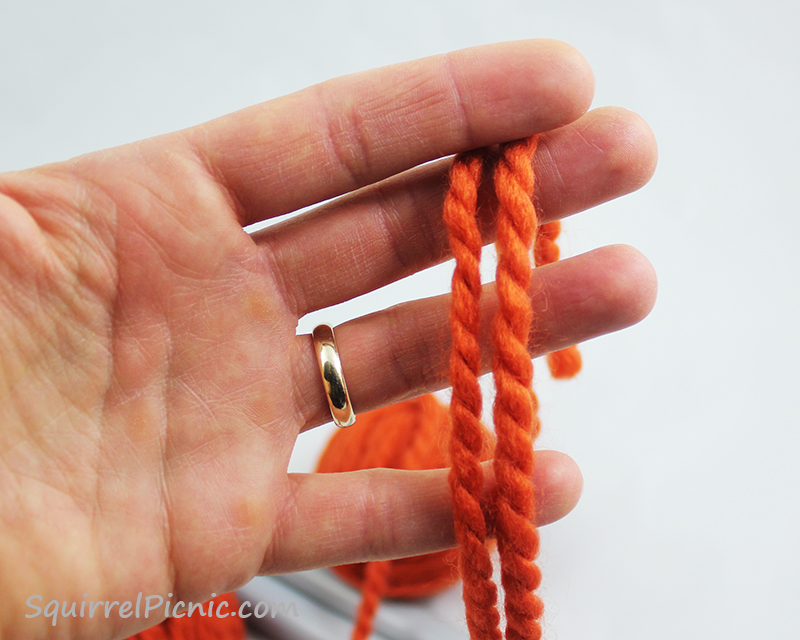
Double up your yarn: one strand from each ball. You will be working with 2 strands at once throughout the pattern.
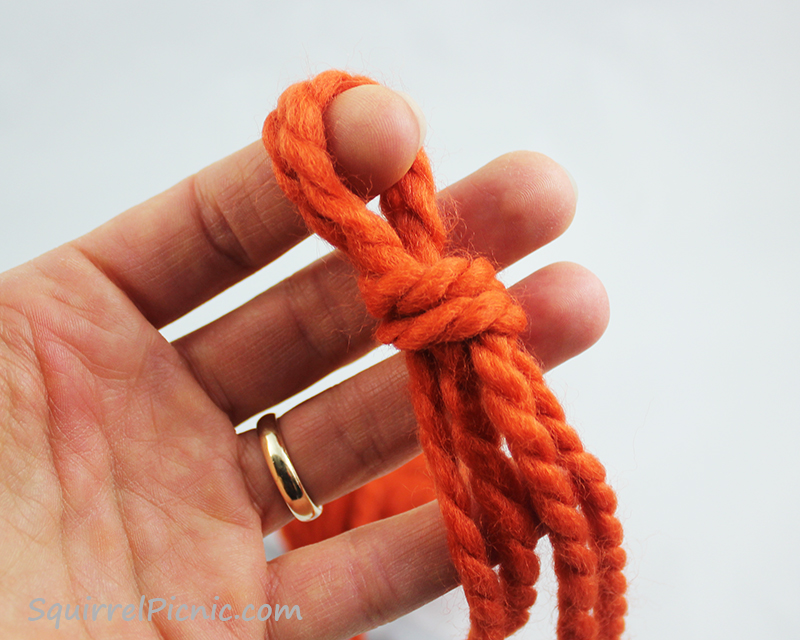
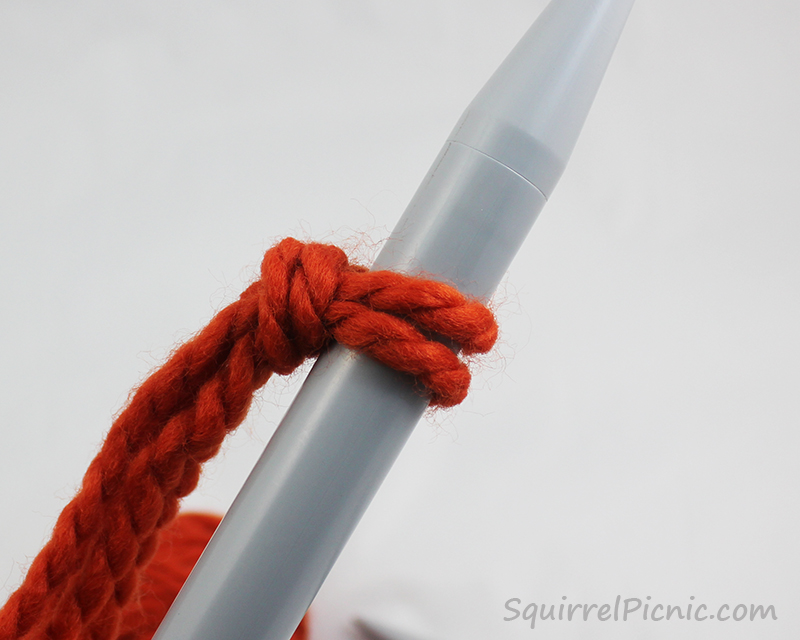
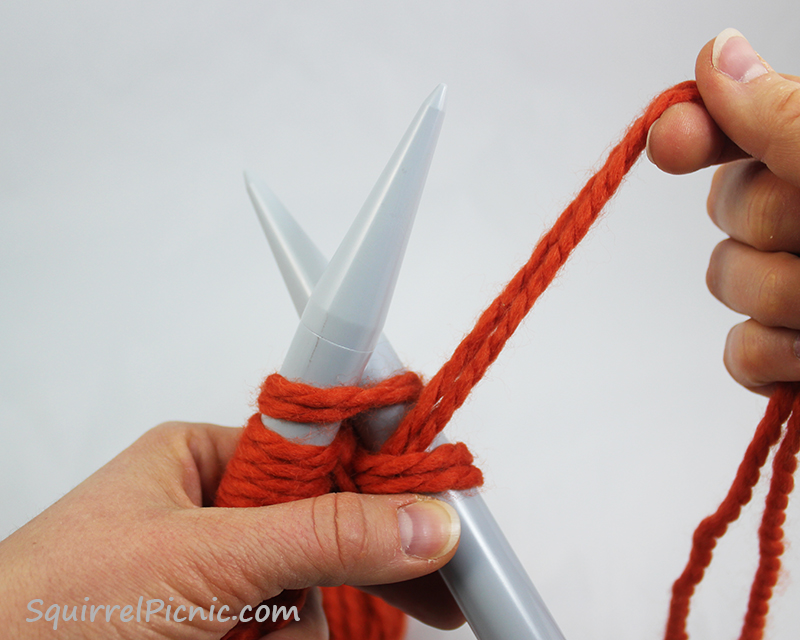
Let’s begin by casting on our stitches. Make a slipknot with your doubled strands of yarn.
Place the slipknot on one knitting needle and hold it in your left hand.
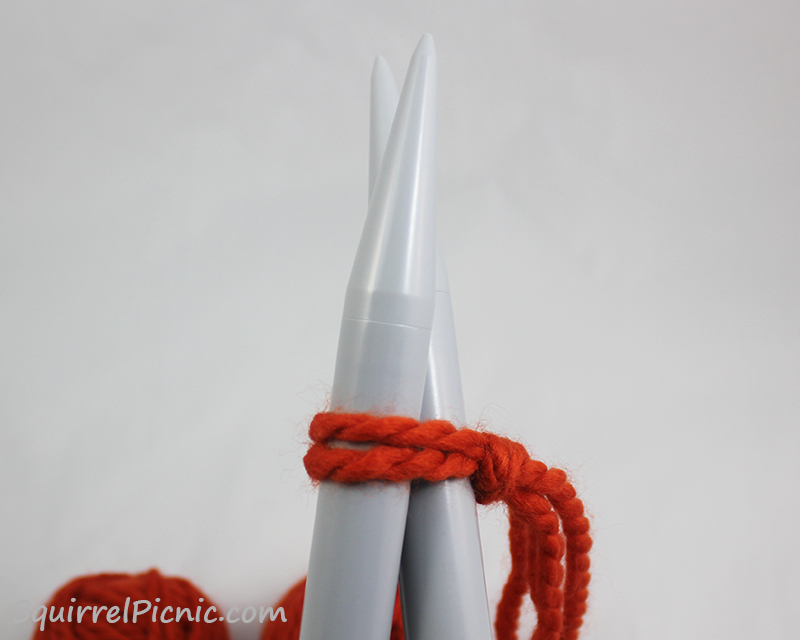
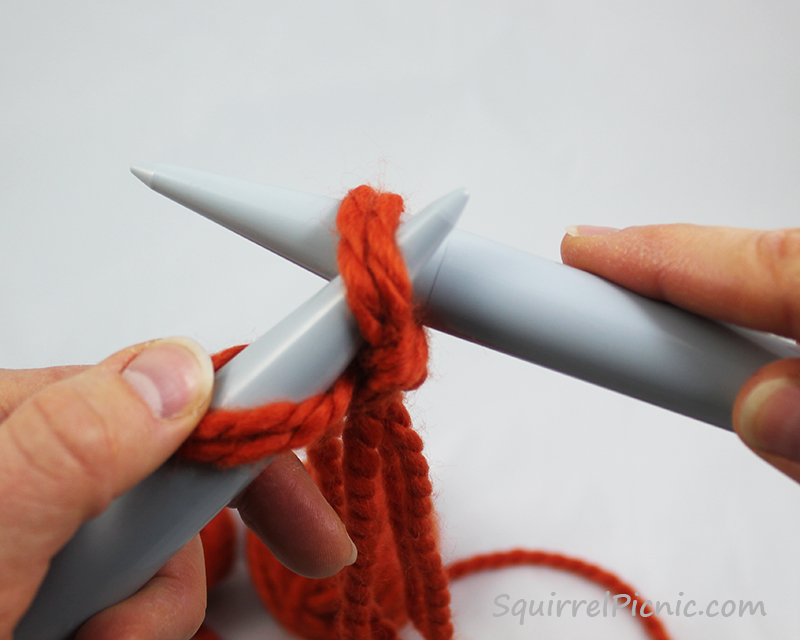
1. Insert the other knitting needle and position it behind the first, as if to knit.
2. Wrap the working yarn around this right-handed needle and bring it to the front. This is a yarn over (yo), which we will use later in the pattern in addition to casting on (CO).
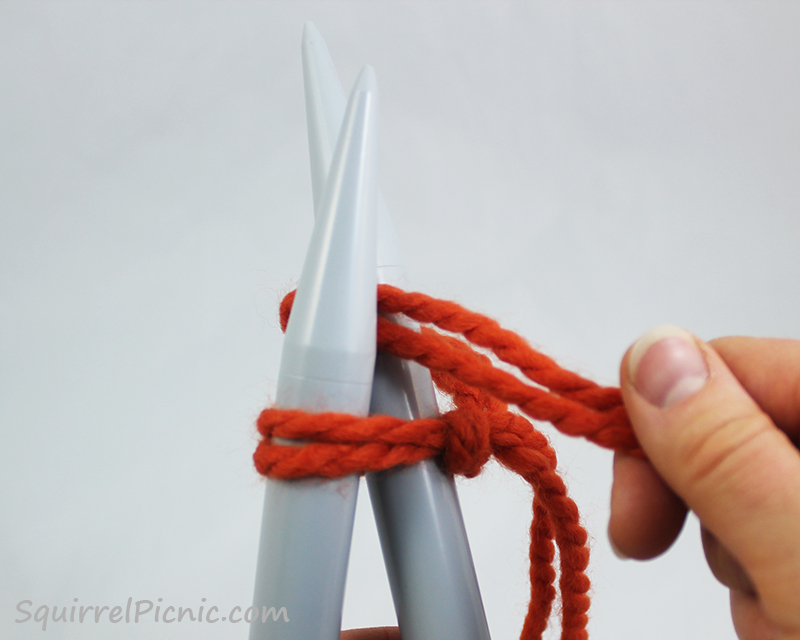
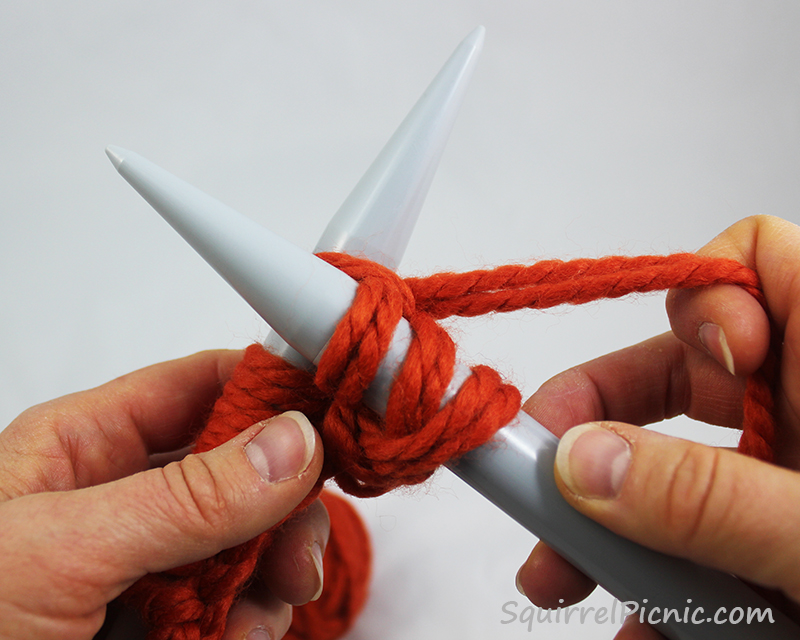
3. Move the tip of your right needle down and to the front, drawing the yarn-over strands down and through the slipknot as you go.
4. Pull this yarn over through and place it on the left handed needle.
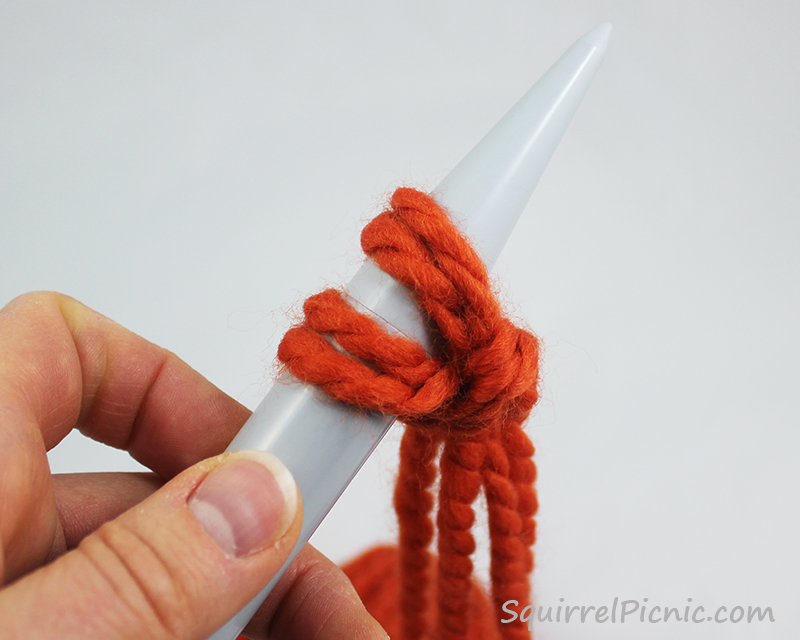
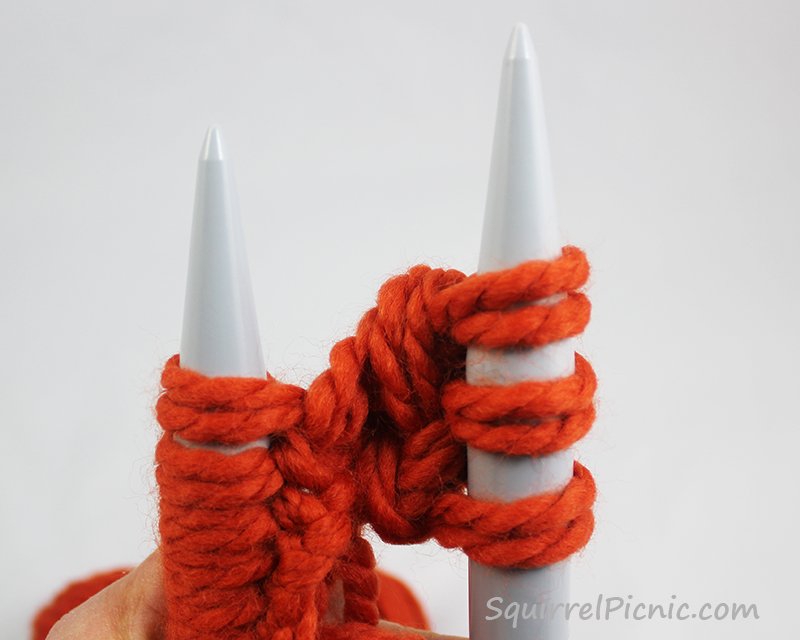
Now you have 2 stitches on your needle.
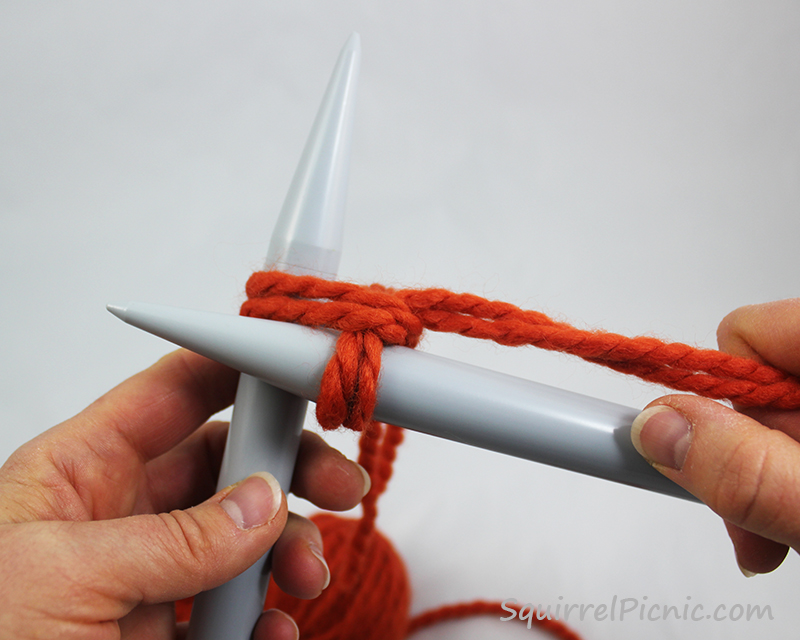
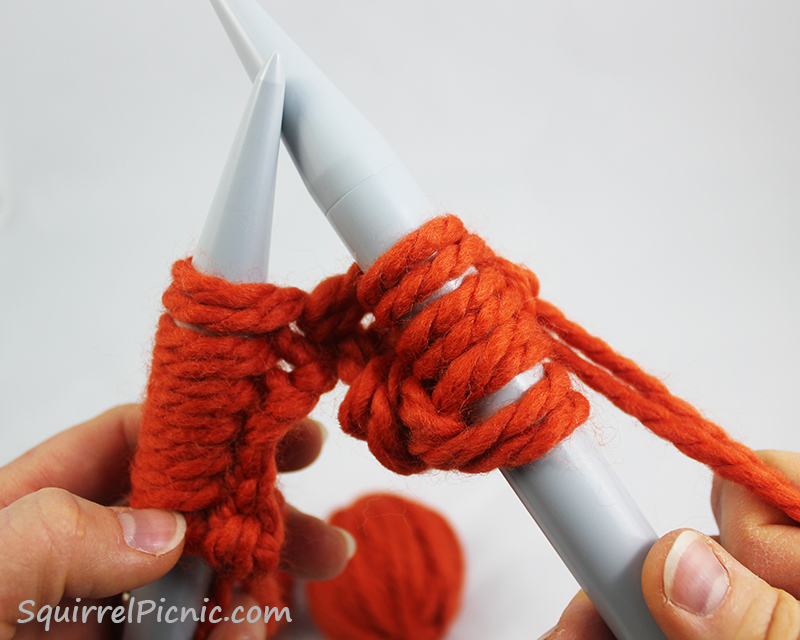
Repeat steps 1-4 until you have 10 stitches on your needle.
Remember, the yarn is doubled, so when you count your stitches, count in pairs.
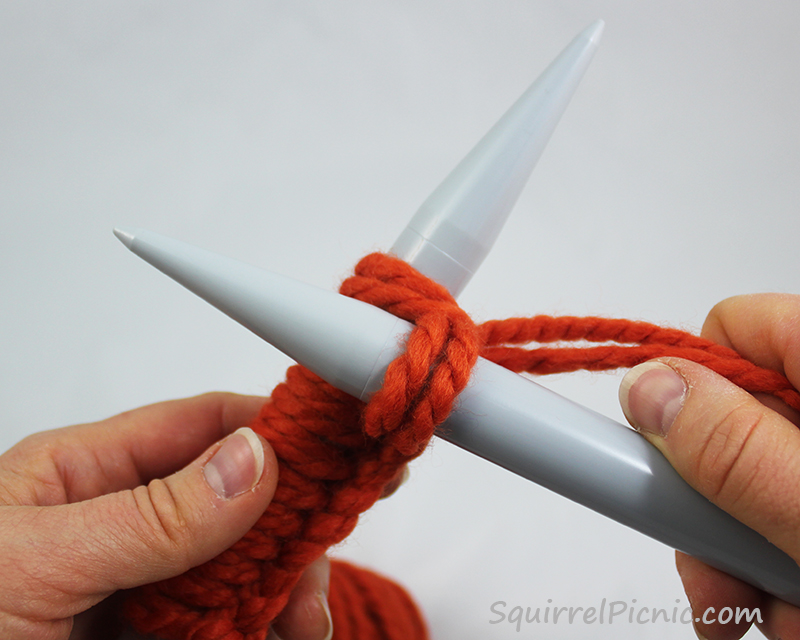
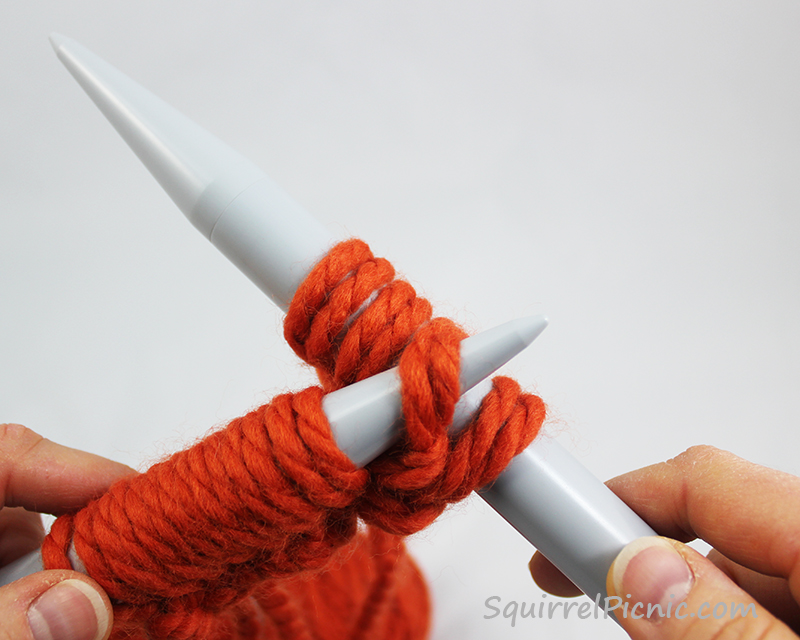
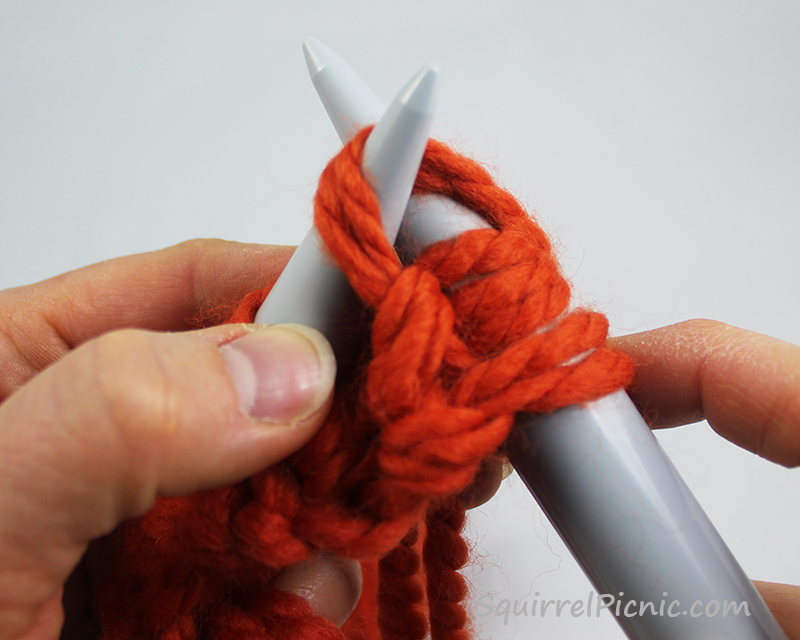
Now let’s work the pattern. Knit the first stitch (k1).
Yarn over (yo).
Knit the next stitch by inserting your needle as you normally would and wrap the working yarn around behind the right-hand needle, between the needles, and to the front.
Complete the stitch as you normally would to knit.
And knit the next stitch as well.
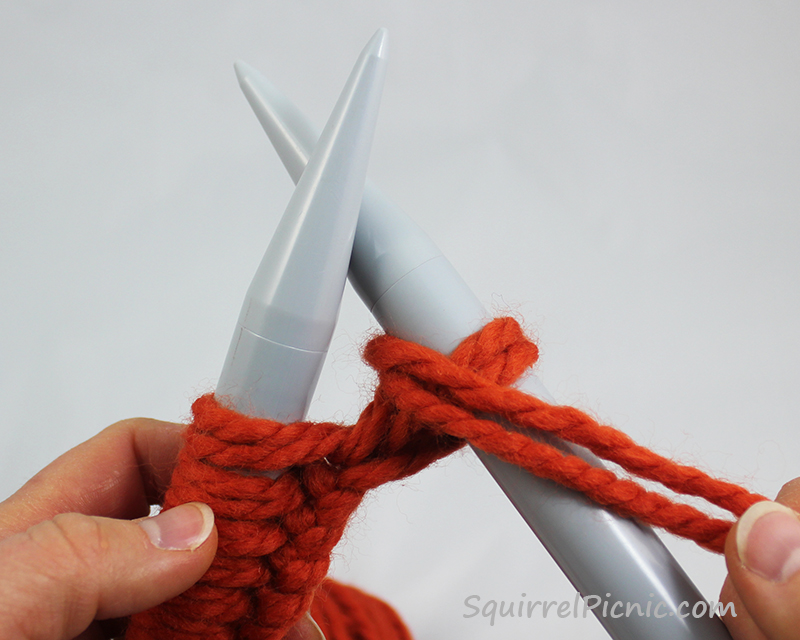
Now to pass the yarn-over stitch, insert your needle into the front of the yarn-over stitch (it’s the third one back on your right needle).
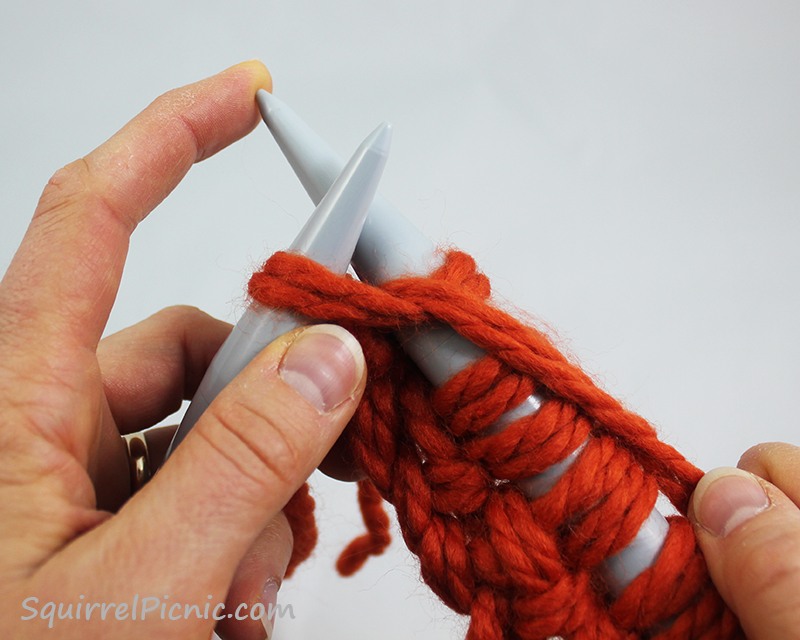
Lift it up and over the two stitches you just knit.
Pull it off your needle and let it go.
Repeat these steps (“yo, k2, pass the yarn over st over both knit sts” in the pattern) until there is only one stitch remaining on your left needle.
Knit the last stitch.
Now you have completed your first row.
Keep repeating the pattern for each row until you run out of yarn. Then BO loosely.
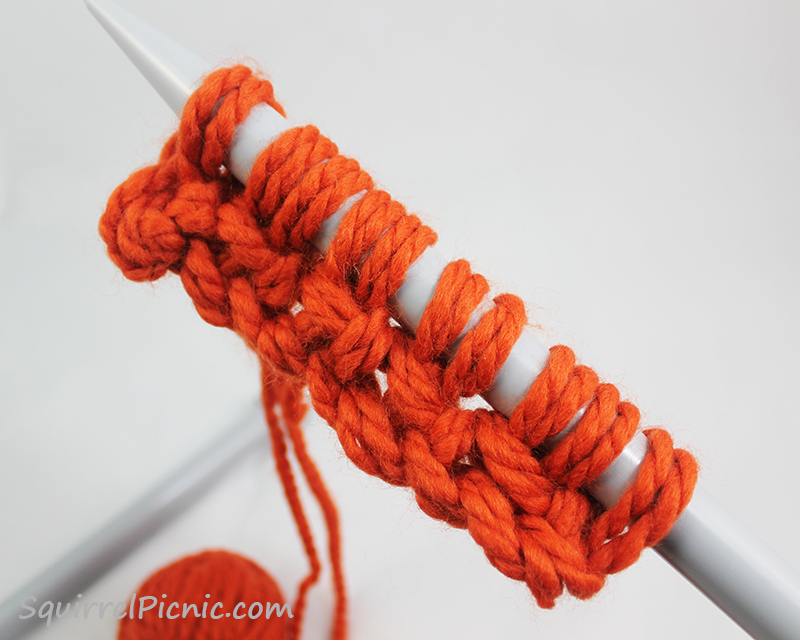
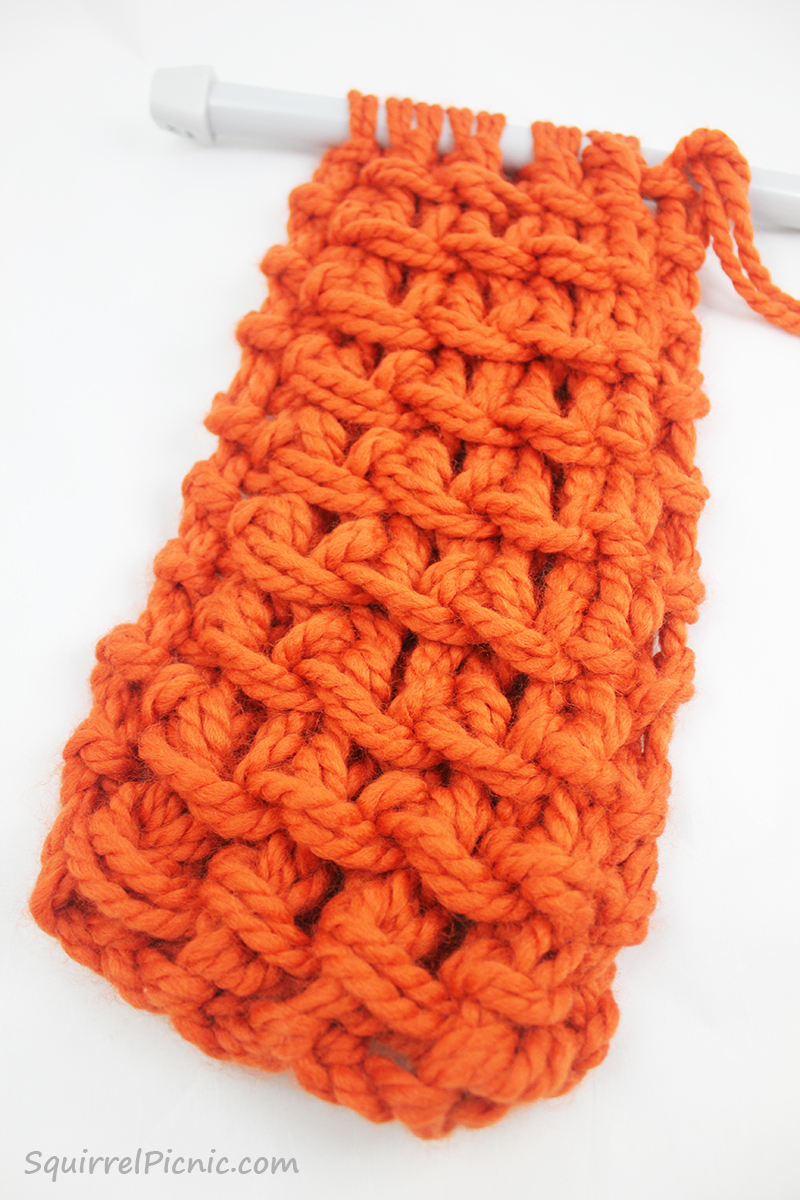
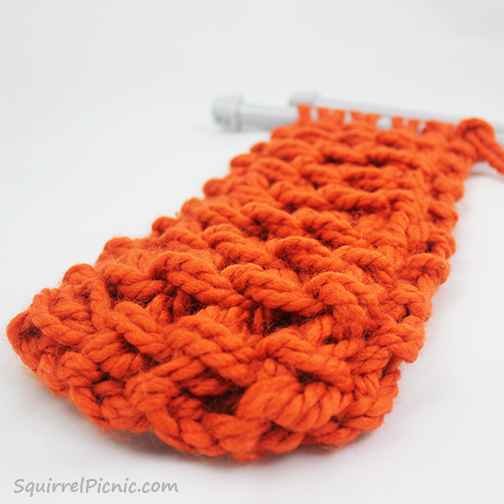
It might seem a little tricky at first, but once you get the hang of it, your needles will start to fly and you’ll have a unique scarf in no time.
Look at how thick and luxurious it will be!
And finally, here is a closeup of the stitches that make up this pattern.


You must be logged in to post a comment.