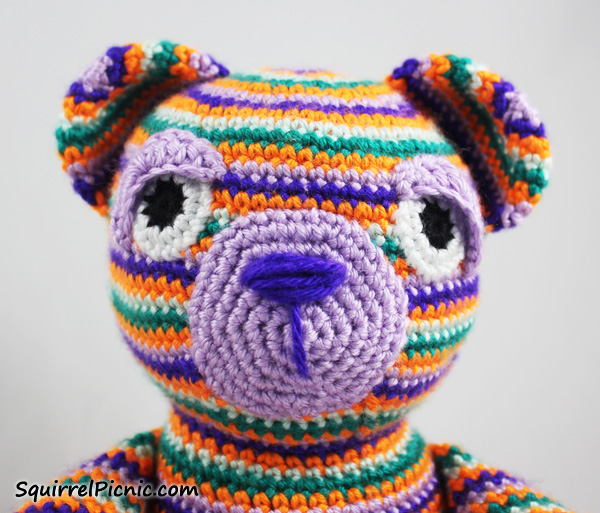
 To crochet the eyes, nose, and mouth seems like the obvious way to add a face to your amigurumi, but I have to admit that it’s the method I use least often. I usually opt for embroidery or safety eyes, but after putting together this tutorial, I know I will turn to this method more often. I hope you will too!
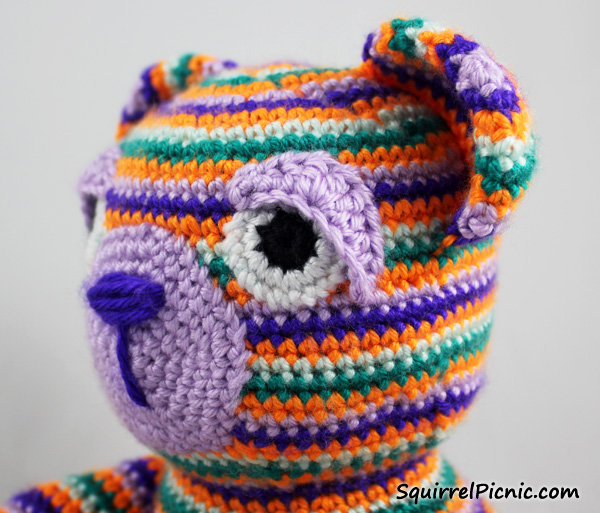
In fact, there are three things I have discovered most appealing about these crocheted eyes: (1) they are easier and faster to make for larger toys than embroidery; (2) they are ideal if you are making the toy for a child, because as long as the pieces are sewn on securely, they won’t present a choking hazard; and (3) you can play with the placement of the eyelids to create a very unique look. A lot of a toy’s personality depends on how you place the eyelids. If you want the toy to be dopey, place them farther back on the eye. If you want him to be happy, place them directly above the eye. If you want him to be angry, place them farther forward. Have fun playing around with the placement to see what expressions you can create.
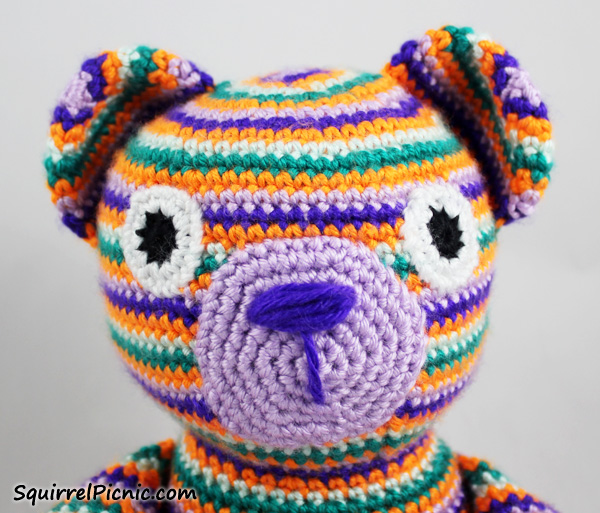
In this tutorial I used worsted-weight yarn and a G-6 (4.00 mm) hook to crochet the eyes and eyelids for a 10-inch teddy bear. If you are making eyes for a smaller amigurumi, like my squirrel for instance, you might try using crochet thread and a steel hook size 00 or smaller. If your amigurumi is a size somewhere in between those two, you might play around with different yarn weights and hooks to get the eye size you desire.
Grab your hook and some yarn in black and white and the color of your choice for the eyelids. You’ll also need a pair of scissors and a yarn needle. Let’s begin!
1. Crochet an eye.
With black, ch 2 or begin with a magic loop.
Rnd 1: 10 sc in 2nd ch from hook (or into magic loop and close). Join with slst. Break yarn. (10)
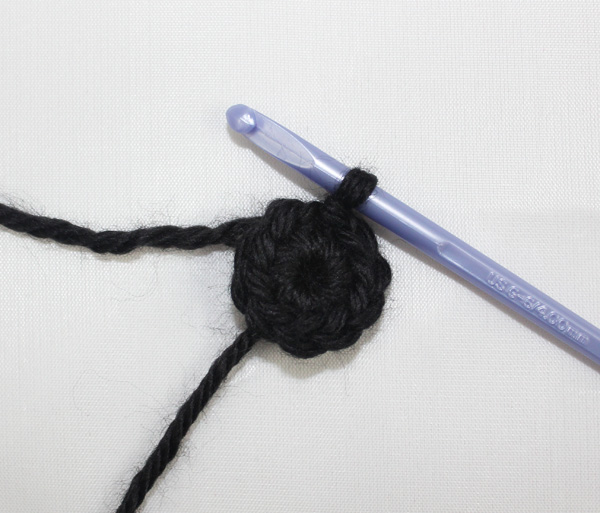
Rnd 2: Ch 1 with white. 2 sc in next sc and ea sc around. Join with slst. (20)
FO, leaving a long tail. Weave in all other ends.
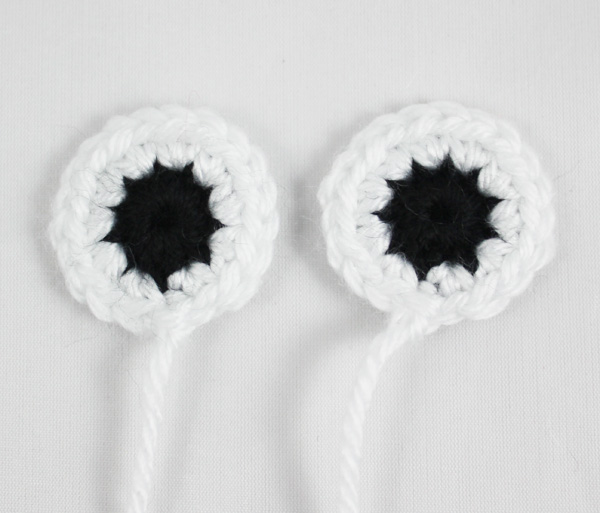
2. Repeat Step 1 to make another eye.
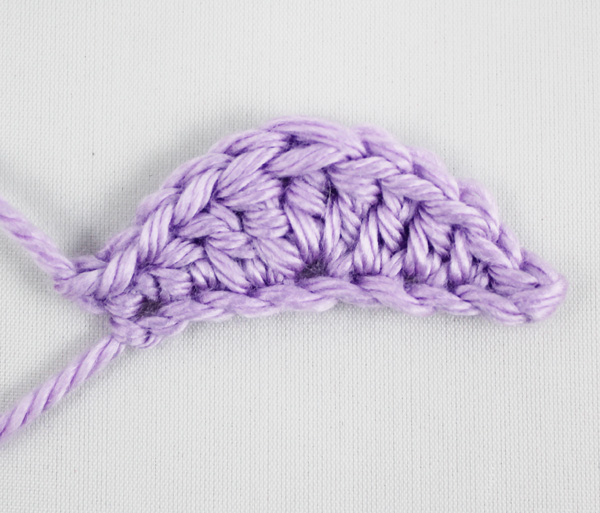
3. Crochet the amigurumi’s right eyelid (your left).
Ch 9.
Working back down the chain: Sc, hdc, dc, (htr, tr, htr), dc, hdc, sc, slst. FO, leaving a long tail. 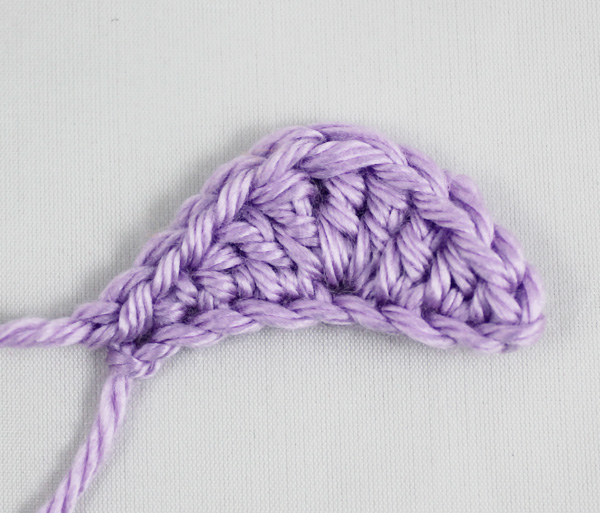
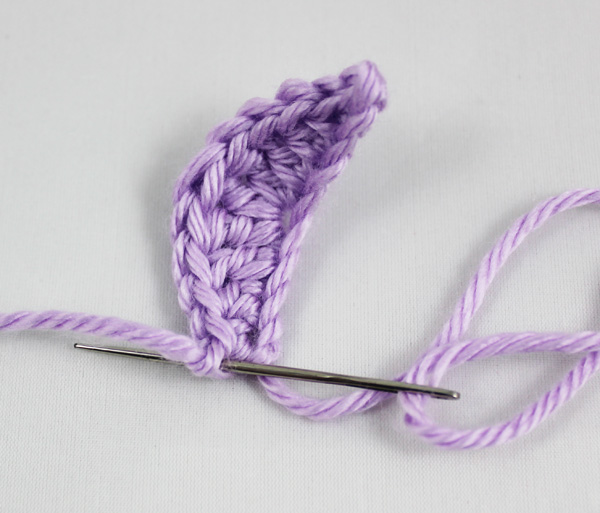
4. Thread the tail from the beginning of the chain onto a yarn needle. Insert your needle under the loops of the slst and pull the yarn through. Weave in this end.
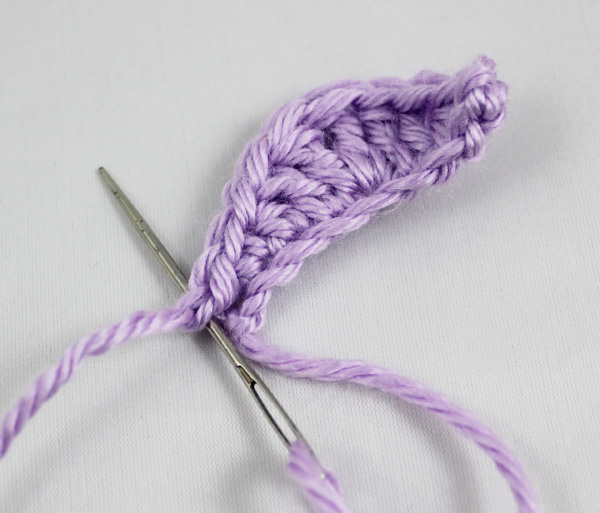
5. Crochet the amigurumi’s left eyelid (your right).
Ch 9.
Working back down the chain: Slst, sc, hdc, dc, (htr, tr, htr), dc, hdc, sc. FO, leaving a long tail.
6. Thread the tail from the beginning of the chain onto a yarn needle. Insert your needle under the loops of the sc and pull the yarn through. Weave in this end.
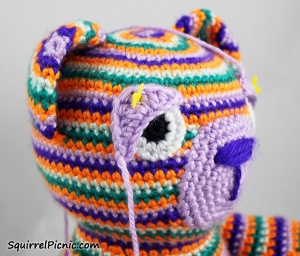
 7. Pin eyes to amigurumi.
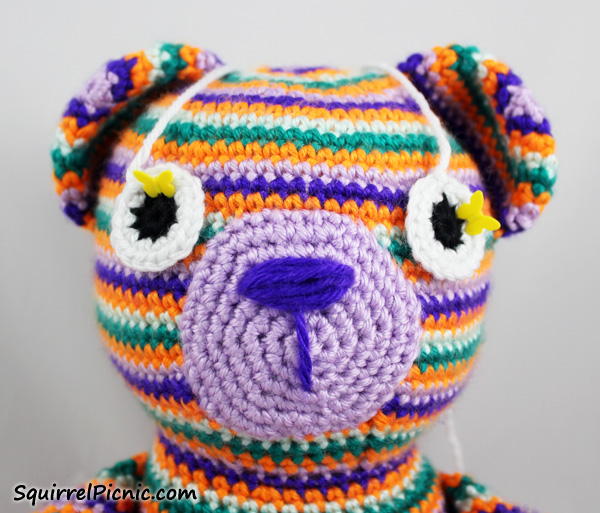
8. Using the long tails, sew eyes to amigurumi.
9. Pin eyelids to amigurumi.
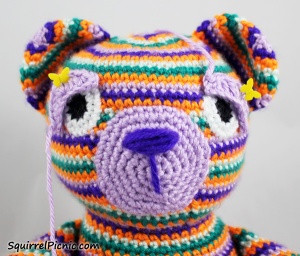
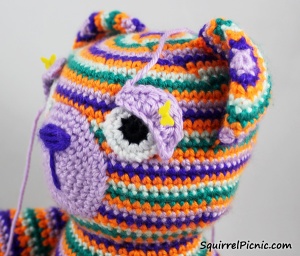
10. With the long tails that you didn’t weave in, sew eyelids to amigurumi.
 11. Give your amigurumi a big hug for putting up with all that poking and prodding.
To crochet the nose and mouth like the one on this bear, download the free PDF tutorial:
How to Embroider a Nose and Mouth by Jennifer Olivarez
Join us next week when I’ll share the free crochet pattern for this striped little cutie — Motley the Bear!


April 17, 2015 at 4:00 am
Too Cute!!!
April 17, 2015 at 4:49 am
Thanks!
April 17, 2015 at 4:14 am
Adorable…. I love your tutorials!!
April 17, 2015 at 4:49 am
Thanks, Tajana! ❤
April 17, 2015 at 4:20 am
Thank you for sharing! This looks super easy too. 😀
April 17, 2015 at 4:51 am
You’re welcome! I agree, I love how fast and easy this method is. Enjoy!
April 17, 2015 at 5:33 am
that’s great, thanks very much. Sharon x
April 17, 2015 at 2:50 pm
You’re welcome!
April 17, 2015 at 6:15 am
I have to try this too! It looks great and very sweet on your Teddy!!!
April 17, 2015 at 2:49 pm
Thank you!
April 17, 2015 at 7:45 am
Thank you for sharing.
April 17, 2015 at 2:49 pm
You’re welcome, Julie!
April 17, 2015 at 8:18 am
Very helpful, thank you!
April 17, 2015 at 2:49 pm
You’re welcome, Sandy!
April 17, 2015 at 9:43 pm
Thank you for some inspiration re the eye lids. I just finished a Kelpie and the eyes are a little too round. If it works I will link back for fun with before and after pics. 😀
April 19, 2015 at 6:17 am
Yay! I can’t wait to see your Kelpie. 🙂
April 18, 2015 at 2:48 pm
Thank you so much for this 🙂
It’ll make my life a lot easier that dealing with embroidery thread – I never seem to get that right! Lol
April 19, 2015 at 6:18 am
You’re welcome. Enjoy!
Pingback: ami eyes | gentlestitches
April 25, 2015 at 3:19 pm
Excellent tutorial Jennifer!
Thank you
April 25, 2015 at 4:53 pm
Thanks, Vanja! Glad you enjoyed it!