 I love the look of satin stitch embroidery, but I don’t use it very often for my amigurumi because, I have to warn you, it does take longer to do than any of the methods I have shown you so far. It also takes a lot of focus, because you have to repeat the same stitch over and over again until an area is filled in. You will probably notice in this tutorial that by the time I got to the white part of the eyes, I had gotten a lot less picky about the straightness of my stitches. Looking back, I wish I would have taken a break halfway through or put the project aside for a day or so. Then I would have been able to come back to it fresh: fresh eyes, fresh mind. In the least, I hope you might learn from my mistake. If you find yourself growing frustrated or impatient, feel free to take a break. You certainly have my permission.
That aside, I think you will be pleased with the results you achieve by using satin stitch embroidery to add details to the faces on your amigurumi. I always think it looks very professional, as this is the technique most often used by large toy companies to manufacture stuffed animals for young kids. Satin stitch embroidery is a great choice for toys that will be used by children of all ages, because you don’t need to worry about any small parts that might present a choking hazard. While the big companies use machines to do all the work, I will show you how to do it by hand. After all, it’s the time and love that you put into it that makes a hand-embroidered stuffed animal so special.
Let’s begin!
Materials
2 long pins
DMC 25 Embroidery Floss in black, white, and your choice of eye color
Chenille or tapestry needle
Thimble
Instructions
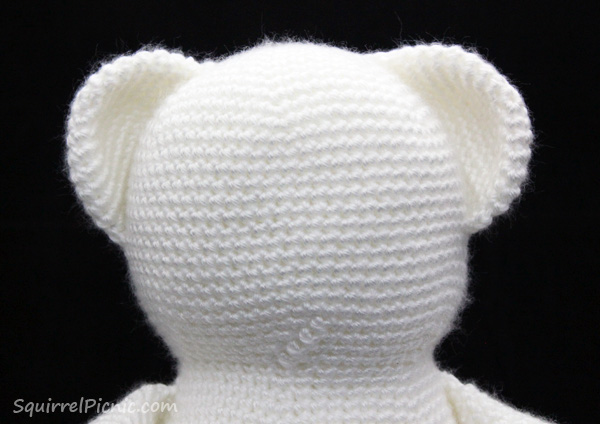
1. Start with a blank canvas. I recommend sewing your amigurumi together completely before beginning to embroider the face. That includes sewing on the ears if applicable. Having everything in place will help to give you a better idea of where to place the facial features.
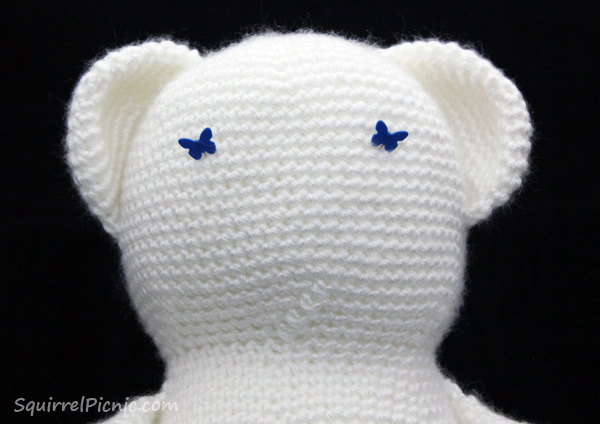
2. Give yourself a guide. Place a pin where you want the center of each eye to be. Be sure to step back and take a look to make sure they are even. If I’m not feeling certain about it, I might even count the stitches from each ear to each pin to make sure that they are even and to double-check that the pins are on the same row.
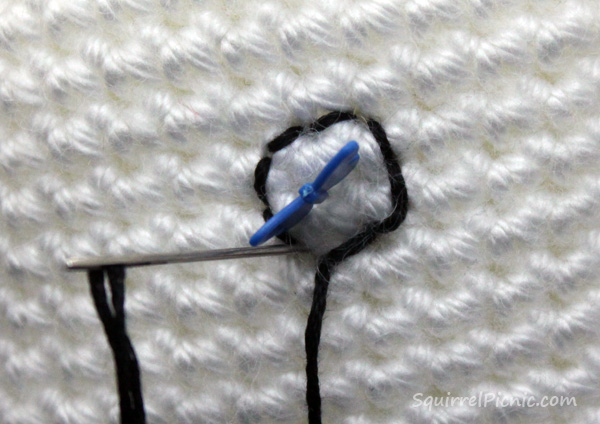
3. Outline the eye. With black embroidery thread and needle, back stitch a circle around the pin about 1/2” out from it. If you’re anxious about making it even, you might use a fabric pencil to draw a circle around the pin first.
4. Fill in the circle with satin stitches. Come up with your needle as close as you can get to the inside of the circle outline and go down on the opposite side in the same manner. Continue to fill in the circle, working from bottom to top. You don’t have to pull the thread really tight; it’s better just to make sure that each stitch lies flat with the others. Go back and fill in any gaps if needed.


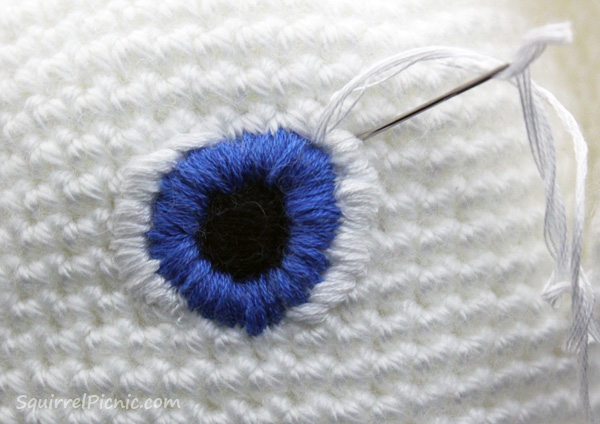
5. Make the iris. With the eye color of your choice, satin stitch the iris. Come up as close as you can get to the pupil and go down about 1/4” to 1/2″ out. Continue in this way around the eye, making each stitch as close as you can get to the previous one so that none of the crochet fabric shows. This part always takes the longest, so I have to remind myself to be patient.


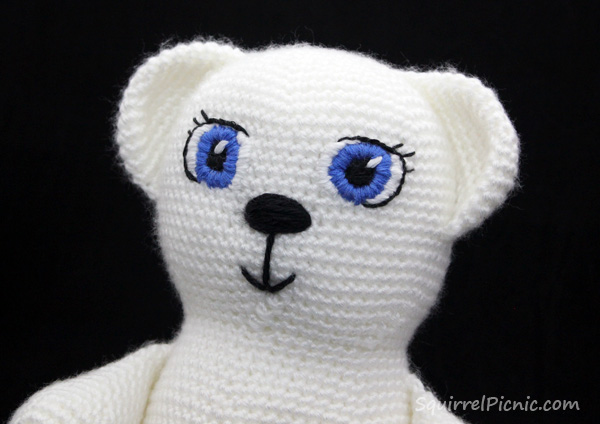
6. Make the white of the eye. With white thread, satin stitch a crescent shape on either side of the eye. Even on toys done with white yarn, I believe this is an important step because it will give the whole eye an even height on the surface of the fabric. (Note: If any of your stitches are uneven like some of mine are in this picture, you can go back and gently brush them with the tip of your needle in a motion parallel to the stitches.)
7. Make the white reflection spot. While you’re working with the white thread, go back to the iris-pupil area and add the white spot. You can make this as big as you like, from one single stitch to several.


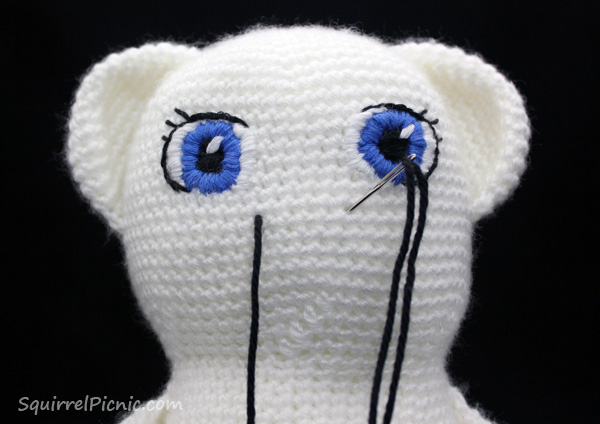
8. Make the lids. With black thread, back stitch or stem stitch a line that traces the top and back side of the eye.
9. Add eyelashes. Bring your needle back up at the top corner at the back of the eye and create a few long stitches for the eyelashes.


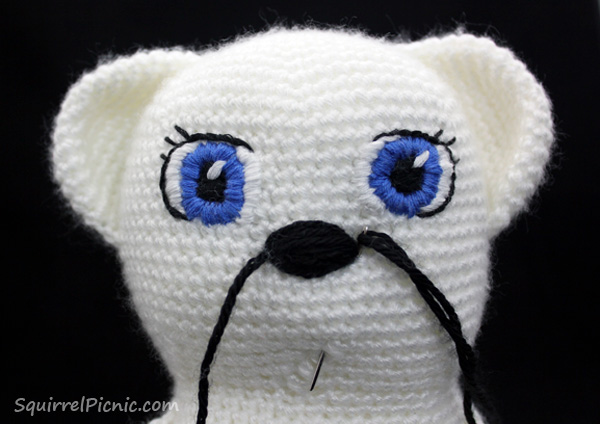
10. Make the nose. Thread your yarn needle with black yarn and, going in through the back, come out on the front where you want your bear’s nose to be.
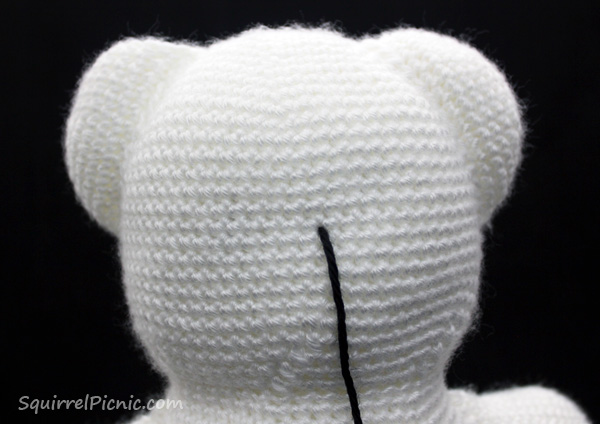
11. Go down with your needle on the other side where the nose should end.
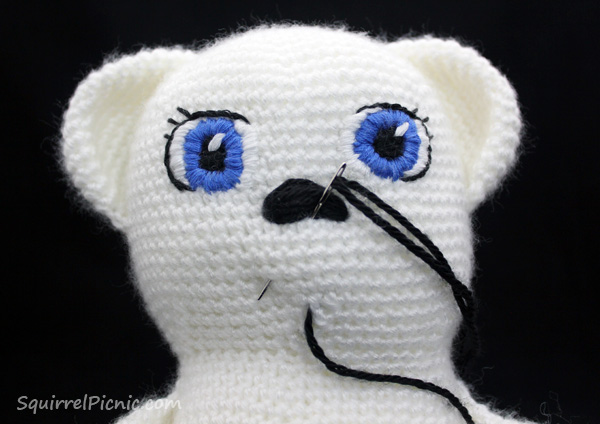
12. Repeat this several times to fill in the nose.
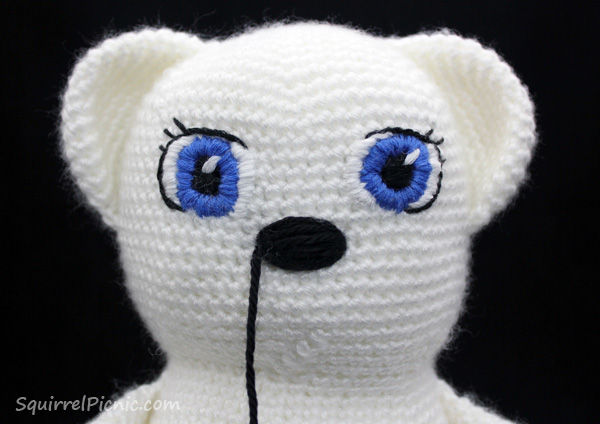
13. On the last pass, go down on the other side as you did in Step 12, but this time come out below the mouth, where you want the bottom of your bear’s smile to be.
14. Connect the nose and mouth. Carefully lift the stitches of the bear’s nose a bit and guide your needle down into the fabric at the center of the nose. Bring your needle out where you want the first corner of her smile to be. Smooth out the stitches of the nose so that the top of the line you just made is covered.
15. Make the smile. Guide your needle down into the stitch at the bottom of her mouth, coming out at the opposite side of her smile.
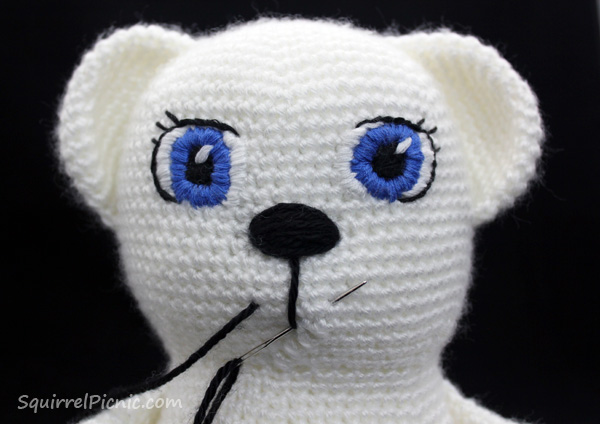
16. Bring your needle back down through the stitch at the bottom of the mouth.

17. To end, pass the needle to the back out the same stitch that you used to begin the nose in Step 10.
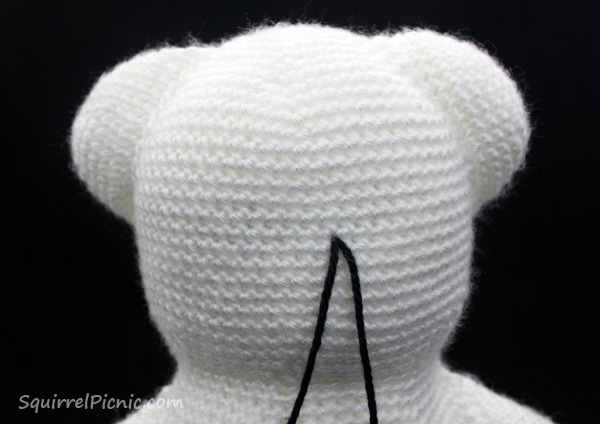
18. I like to tie these two strands in a knot, trim off the excess yarn, and push it all into the bear’s head to hide it.
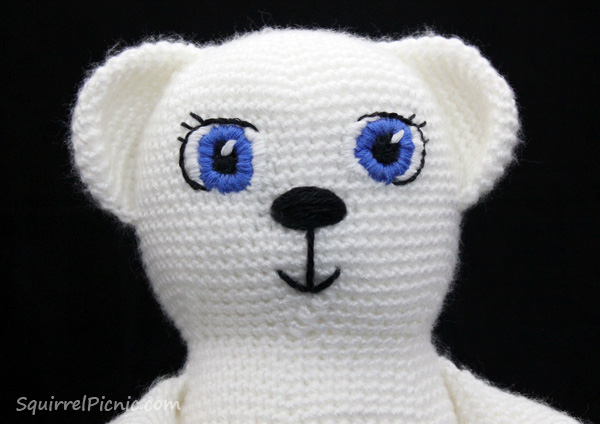
And there you go. You have a beautifully embroidered toy that someone will cherish forever.
For a more detailed tutorial on embroidering a triangle nose with mouth, I’ve provided a PDF: How to Embroider a Nose and Mouth by Jennifer Olivarez
Visit Resources for more tutorials on a wide variety of techniques to add faces to your amigurumi.


June 12, 2015 at 1:29 pm
Thanks for the tutorial. I have been making some pokemons for my grandson and needed help with the eyes. Your eyes are darling.
June 12, 2015 at 1:55 pm
You are so welcome, D Anne! I am really glad that my tutorial will help you. Be sure to check out my resources page, where I have several other methods for adding faces to your amigurumi.
June 12, 2015 at 3:19 pm
Very nice. Thanks for the tutorial.
June 12, 2015 at 3:51 pm
You’re welcome, Andrea! I’m really glad you like it.
June 13, 2015 at 4:51 am
Very cute face, I have tried to embroider the eyes on my first amigurumi’s, but the result was not so good. I will try it again with your tutorial, thank you!
June 15, 2015 at 4:58 am
Thanks! I wish you lots of luck with your next embroidery project! Let me know if there’s anything I can do to help.
June 13, 2015 at 10:22 pm
They are so lovely! I am also looking now with “fresh eyes” 😀
June 15, 2015 at 4:57 am
😀
June 15, 2015 at 2:41 am
Amazing tutorial!
June 15, 2015 at 4:57 am
Thanks!
June 17, 2015 at 1:36 pm
Finally!!! Long time I wanted to see this one on!!! Thank you sweetie for taking time to make this tutorial. I very much appreciate it.
Eyes look wonderful this way and I hope, really hope I will be able to make something looking as good as yours.
Thank you!
June 19, 2015 at 4:04 am
I’m really glad you enjoyed this post. I had a feeling you would. 😉 Sorry it took so long for me to put it together. I really enjoyed using this technique on your Mooshka doll. Hope you enjoy trying it too.
June 18, 2015 at 12:21 am
Thanks for sharing! Now I can make more and more amigurumi items.
June 19, 2015 at 4:02 am
You’re welcome!
Pingback: Bordado de cara para un oso - agumirumis
August 1, 2015 at 10:39 am
Thank you, that was very interesting. That is some processes to make an embroidery pattern. Now I understand how it all works.
December 5, 2015 at 6:48 am
very creative and lovely, thank your ideas 🙂
December 5, 2015 at 10:24 am
Thanks, Christina! So glad you enjoyed my post.
January 8, 2016 at 4:18 am
Amazing tutorial!
Silk Digitizing
January 11, 2016 at 4:46 am
Thanks! Glad you enjoyed it.
Pingback: 20+ Cute New Amigurumi Crochet Patterns |
Pingback: How To Add Satin Trim To Crochet | youinsurance