Squirrel Picnic

Handmade with Love and Stuff


11 Comments

In a Nutshell: News from the Picnic

Here in Colorado, summer is breezing along. It’s been a summer of exploration, discovery, and reflection.

Denali seen from Talkeetna
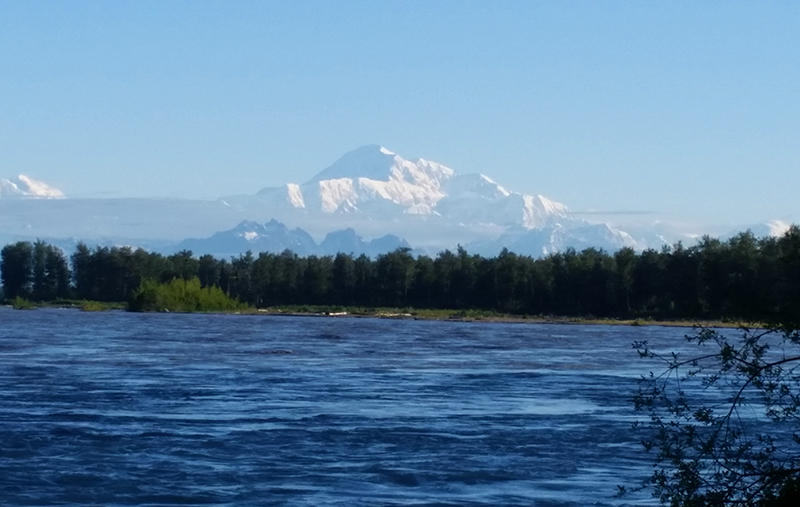
Early on, I did some traveling. In June, my father and I went on a trip together to Alaska, just the two of us. It was the trip of a lifetime. We flew around Denali in a Cesna, took a jet boat up the Susitna to Devil’s Canyon Gorge, watched the Aialik Glacier calve into the bay in Kenai Fjords National Park, and hitched a ride with the sled dogs at Seavey’s Iditarod Tours in Seward. We saw moose, black bear, bald eagles, bighorn sheep, puffins, porpoises, sea lions, otters, and humpback whales!

Then earlier this month, Shelby and I, along with his dad and his dad’s girlfriend Dottie, road the Cumbres-Toltec train from New Mexico to Colorado. The route is full of switchbacks and turns around some beautiful country and steep mountain cliffs. Returning from these outdoor adventures, I have been keen to get outside as much as possible to enjoy Colorado nature, but to tell you the truth, it’s been just too darn hot. In the end, it all worked out because I have a lot of crocheting and designing to do, which I like just as much as being outside!

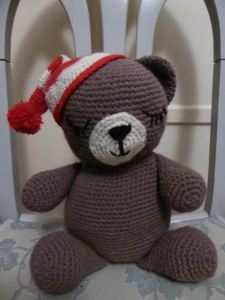
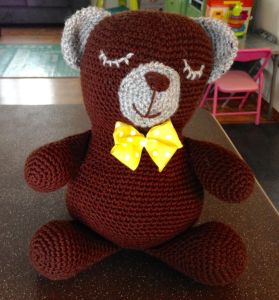
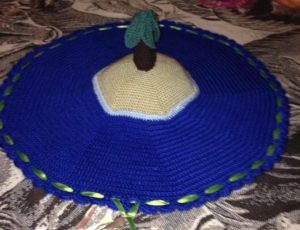
Some incredible things have been going on at the picnic. Regarding the book, there have been interviews and I’ve received some help getting the book into stores. It’s still a challenge, but I’m happy to make progress by baby steps. In other news, I’ve been hard at work on some new designs and some special plans. Here’s what I’ve been up to: Continue reading


7 Comments

You Made This!

It’s so cool to see Squirrel Picnic projects from people all over the world. Thank you all for choosing my patterns and for taking the time to share your finished projects with me.

I’d like to extend a special thanks to these awesome folks, whose projects are featured in this edition: Jane Pitts, Sharon Sumner, Jenny McCoy, Nelle, Janet, Barbara, Elizabeth Robertson, Alicia Rippingale, Emma, Louise, Rene, May,  and Sandra Hauser.

If you’ve made something awesome with one of my patterns, I’d love to include you in a future installment of You Made This! And if there’s anyone I missed, I’m terribly sorry. Let me know and I’ll include you in the next edition. Please send a photo of your project to squirrelpicnic{at}gmail{dot}com.


4 Comments

You Made This!

It’s so cool to see Squirrel Picnic projects from people all over the world. Thank you all for choosing my patterns and for taking the time to share your finished projects with me.

I’d like to extend a special thanks to these awesome folks, whose projects are featured in this edition: Alicia Kelly Rippingale, Margie Smith, Theresa Estep, Christine Knapp, Elaine Womack, Julie-Anna Smith, Marta Ruso, Ina Ringel, Marcia Cristina, Ankharas, Mona Reyes, Taylor, Janette Vanzanen, bpitard, cyrusmum, plantersmith, ellafofella, nlezama, nessiesparklepony, kaypendragon, mamascents, ShiloSol, lyndeepitiak, rpayne8457, violinone, kaurin, Penella, angelclassy, foxxxy, mrsrefjr, rosecrochet44, lese1, Idskje, walkerlover, Blacky67, and Frau Tapete.

If you’ve made something awesome with one of my patterns, I’d love to include you in a future installment of You Made This! And if there’s anyone I missed, I’m terribly sorry. Let me know and I’ll include you in the next edition. Please send a photo of your project to squirrelpicnic{at}gmail{dot}com. Continue reading


22 Comments

How to Add Faces to Your Amigurumi: Satin Stitch Embroidery

Satin Stitch Amigurumi Face Tutorial by Squirrel PicnicI love the look  of satin stitch embroidery, but I don’t use it very often for my amigurumi because, I have to warn you, it does take longer to do than any of the methods I have shown you so far. It also takes a lot of focus, because you have to repeat the same stitch over and over again until an area is filled in. You will probably notice in this tutorial that by the time I got to the white part of the eyes, I had gotten a lot less picky about the straightness of my stitches. Looking back, I wish I would have taken a break halfway through or put the project aside for a day or so. Then I would have been able to come back to it fresh: fresh eyes, fresh mind. In the least, I hope you might learn from my mistake. If you find yourself growing frustrated or impatient, feel free to take a break. You certainly have my permission.

That aside, I think you will be pleased with the results you achieve by using satin stitch embroidery to add details to the faces on your amigurumi. I always think it looks very professional, as this is the technique most often used by large toy companies to manufacture stuffed animals for young kids. Satin stitch embroidery is a great choice for toys that will be used by children of all ages, because you don’t need to worry about any small parts that might present a choking hazard. While the big companies use machines to do all the work, I will show you how to do it by hand. After all, it’s the time and love that you put into it that makes a hand-embroidered stuffed animal so special.

Let’s begin! Continue reading


84 Comments

Sleepy Bear Crochet Pattern

Sleepy Bear by Squirrel PicnicI’d like to introduce you to a friend of mine. His name is Sleepy Bear.

“Hey, Sleepy Bear, wake up. There’s someone here who would like to meet you. Sleepy Bear?”

Well, you’ll have to excuse him. He’s a really sound sleeper. Since he can’t be disturbed, I’ll just tell you all about him.

I’ve been working on this pattern for almost a year now. I don’t think I’ve ever fiddled with a pattern that long! And I’ve made almost a dozen bears in the process. The first one I ever made I gave to a friend who had been hit by a car while riding his bike to work. He said the bear, which he named Buster, brought him a lot of comfort while he was recovering. I made another for my cousin’s first child and another for a friend out of yarn she had given me. The rest I plan to donate to the Children’s Hospital of Denver where they can bring some comfort to the patients.

This bear pattern is unique in one key way: the head and body are crocheted together. I have trouble sewing on heads, especially on larger animals like this one. It’s really hard to get them on perfectly straight. Do you have that trouble too? So with this pattern, you crochet the head, do a round in the front loops only to create the neck and then continue with the body. I think you’ll really like this detail.

Another distinguishing feature of this pattern is the way the appendages are sewn on. Each includes instructions to close up the end. By crocheting the arms and legs and ears closed, you are able to sew them on through that row of single crochet loops. It’s easy! I like for my bears arms and legs to face forward when they are sitting down, so I sew the legs on at an angle on the bottom and the arms on the sides so that they point forward. I’ve included photos to show this placement in case you want to make your bear like mine, but feel free to play around with the placement to find the positioning you like best.

I hope you enjoy making a Sleepy Bear.

This slideshow requires JavaScript.

Sleepy Bear’s Naptime Accessories

Any nap just wouldn’t be complete without a nightcap and blanky.

Check out these new free crochet patterns for Sleepy Bear accessories.

Sleepy Bear's Naptime Accessories Crochet Patterns

Sleepy Bear Crochet Pattern

Sleepy Bear Crochet Pattern by Squirrel Picnic Continue reading