Charm exchanges are a blast! I had never even heard of a charm exchange before Sylvie approached me to be a part of hers. And I’m so glad that she did. It introduced me to a whole new world: I got to try mini-crochet for the first time, expand my jewelry-making skills, and meet a bunch of really great artists whom I can now call my friends.
This being the charm exchange finale, I thought we might accomplish two things: (1) show off our final jewelry pieces to the world and (2) answer all your questions and provide advice on how you can start an exchange of your own, because seriously, you really should try this! Continue reading →
Our bracelets and necklaces are nearing completion as my friends and I met for another round of the charm exchange. I really admire how each artist has chosen to address the different themes, and it’s been really interesting to see how the variety of mediums used work together in each collection.
One of the things I have enjoyed most about this experience is the sense of community. Most artists spend a lot of time working on their craft alone in their studio or workshop or craft space. Collaborations like a charm exchange allow us to meet up with other artists, share our talents and expertise, learn about new mediums and techniques, and be inspired by the work of others… in addition to chatting about life and enjoying a good meal together.
Have you started a charm exchange like ours? Do you get together regularly with friends for craft nights? Let me know how you have developed a community around your craft and I’ll share your experience next time when we wrap up this series with our final charm exchange. Stay tuned for photos of our completed jewelry pieces and more information about how to start an exchange of your own. Until then, here are the newest additions to our charm bracelets and necklaces. Continue reading →
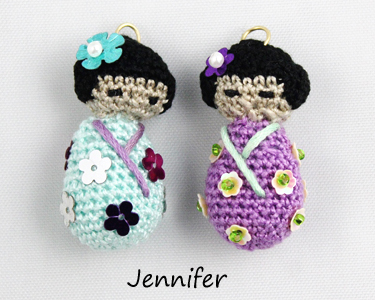
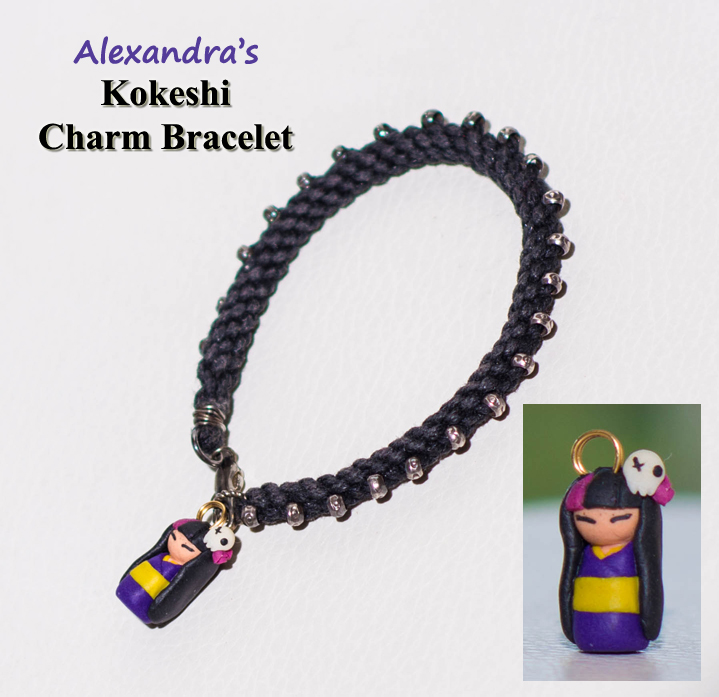
I have been looking forward to working on the charms for Alexandra’s charm bracelet since the beginning of this exchange, because I’ve been dying to try out the kokeshi doll pattern in Sara Scales’ book Mini Amigurumi.
It was so much fun to crochet these! For the first time, I feel I am starting to get the hang of mini amigurumi. The learning curve is greater than I originally expected. I mean, it’s crochet. I can crochet, so why is this so hard? Well, here is what I’ve learned…
It takes a lot more patience, dexterity, and keener eyesight than regular crochet. Good lighting really helps too. You have to be very conscious of your tension. Because I was working with fine thread (No. 8 crochet thread), I found it a little more difficult to get the same grasp I would with yarn. I wanted my tension to be tight enough that you wouldn’t be able to see the stuffing through the stitches, but not too tight that I would have to struggle to insert my hook into the stitches. I also discovered that invisible decreases don’t work as well with thread or maybe with this scale. It created larger holes than a standard sc2tog decrease.
So now that I’ve had a few months of practice, I’m ready to try out all the mini amis in Sara’s book. They are all so cute! But first, follow me as I show you how I made these kokeshi doll charms. Continue reading →
Our group of fabulous jewelry-making artists met at Axios Estiatorio in Denver on a rainy October Sunday to exchange charms and enjoy some really fantastic Greek food.
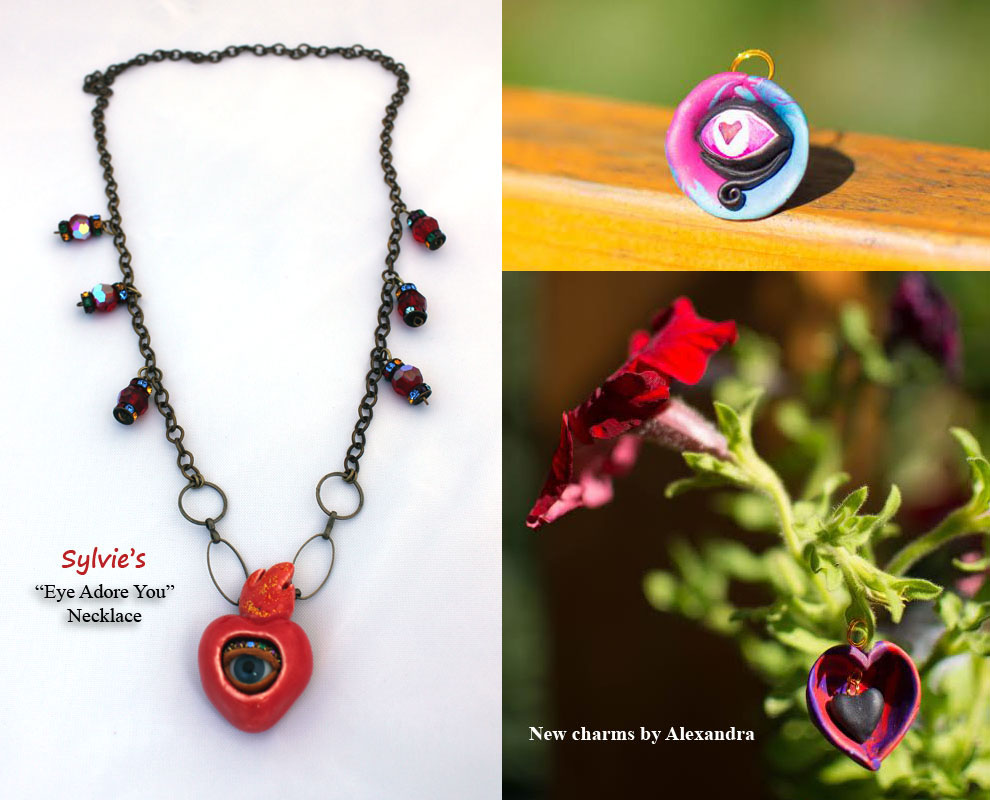
Annie started us off by showing the eye and heart charms she made for Sylvie’s “Eye Adore You” necklace. Using mixed media that includes beaded embroidery, felt, hand-stitching, and some very unique statement beads, Annie’s charms are truly eye-catching (excuse the pun).
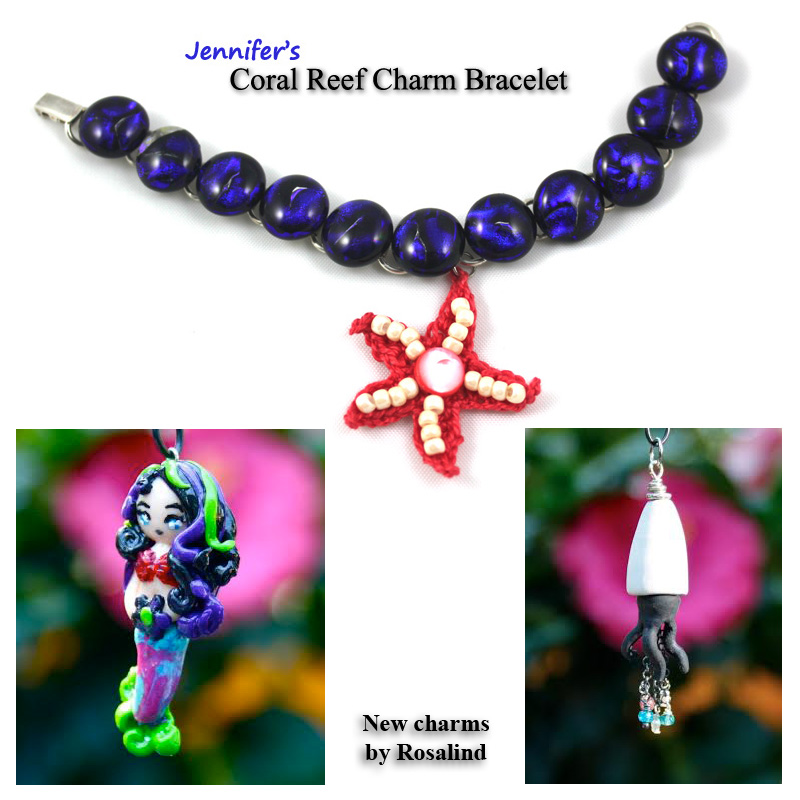
Sylvie’s charms for my Coral Reef bracelet included a mermaid and a jellyfish. A tiny model mermaid rests inside one of Sylvie’s signature “deviled eggs” – miniature dioramas that are truly delightful! The jellyfish was made with long plumes of yarn in a variety of colors and textures that really capture the look of tentacles.
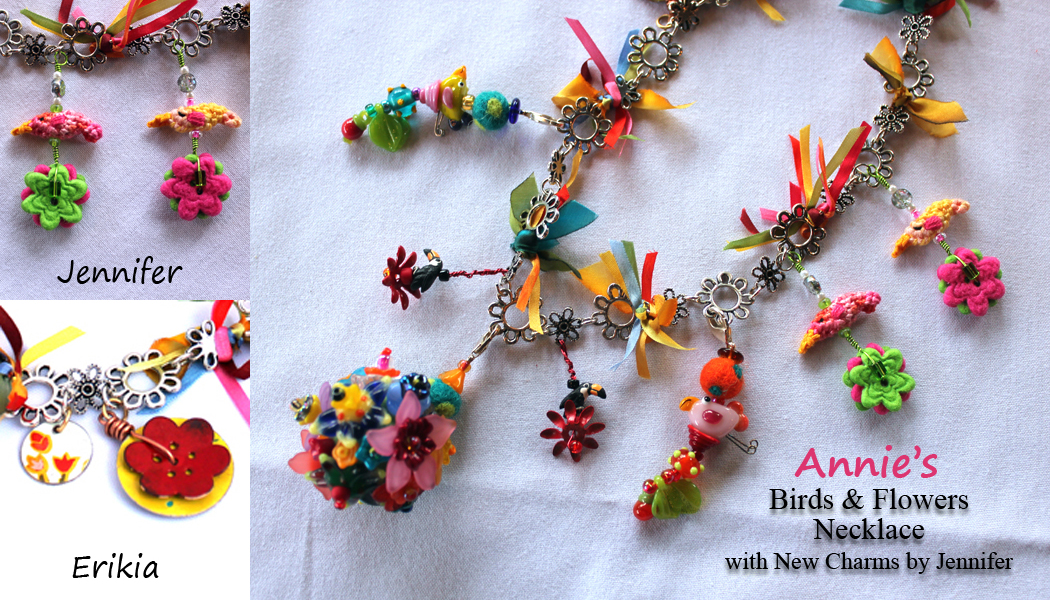
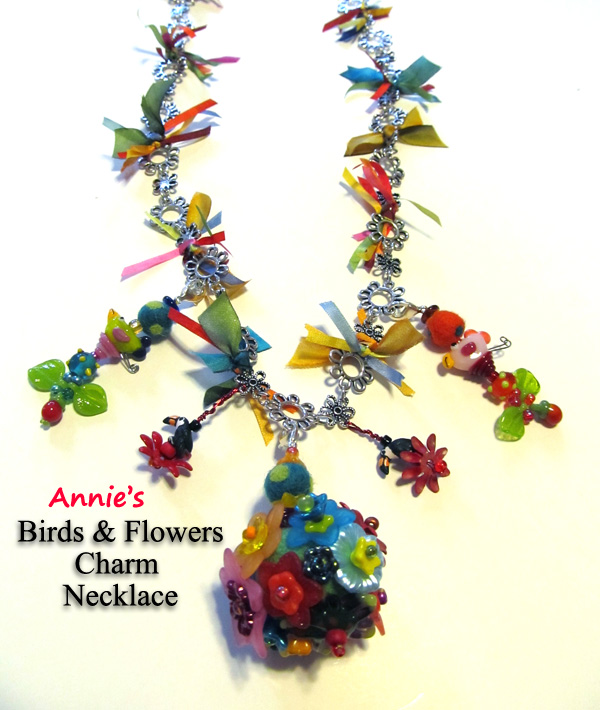
For Annie’s Birds & Flowers necklace, I crocheted two small birds based on a pattern I found at Attic 24. Using DMC floss and a size 10 steel hook, I crocheted three rounds, then added a tail before fastening off. After folding the bird in half with the tail at the back, I sewed up the bottom. Then I added a crocheted beak and stitched on the eyes and wings. The large flowers at the bottom are made from felt buttons (the same ones I use in Podge’s hair).
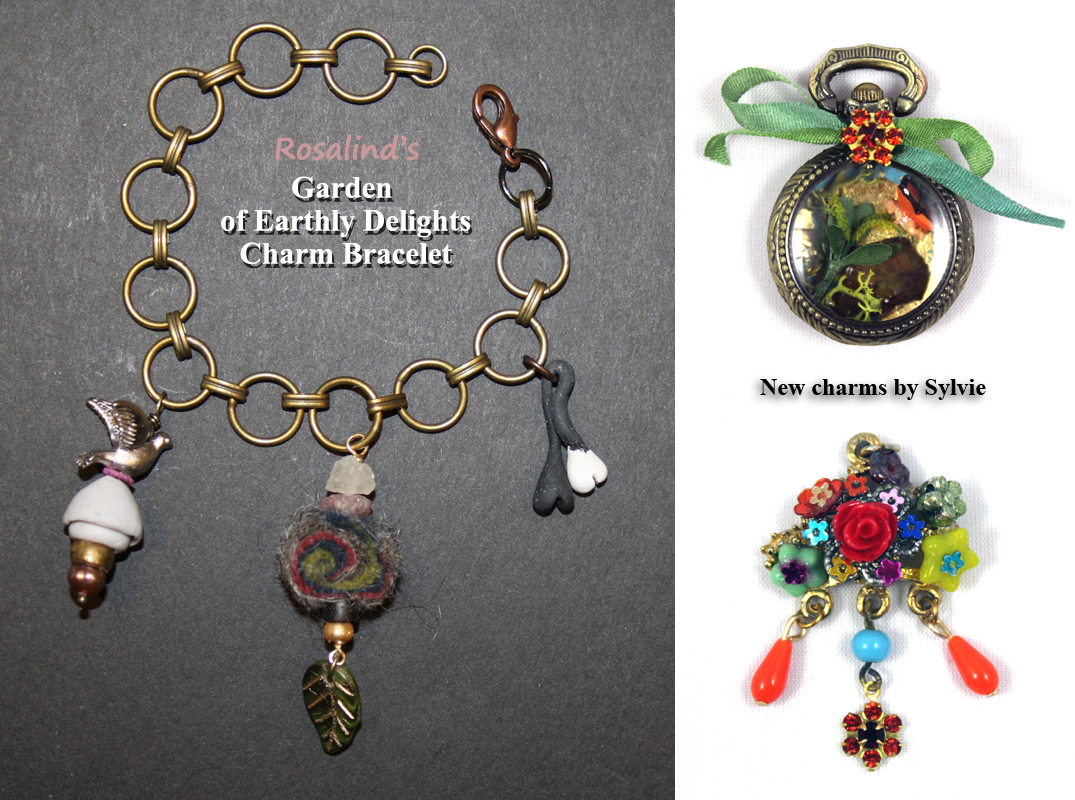
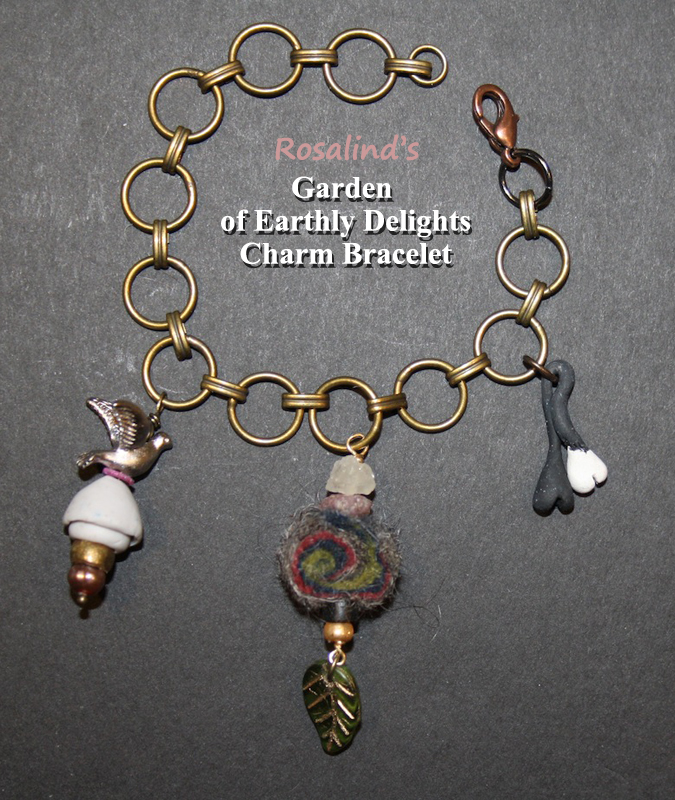
Alexandra explained that she experimented with new tools to work with fimo on her charms for Rosalind’s Garden of Earthly Delights bracelet, adding that she loves using the tiny ballpoints on the tool to make the pieces stick. She was surprised at how the rose head didn’t cause too much trouble — she made the head, stuck on the hair, and added petals around where needed.
Our charm bracelets and necklaces are really starting to come together. Don’t they all look great! Join me next month to see how I go about crocheting a kokeshi doll for Alexandra’s bracelet. It should be a lot of fun!
On a bright Sunday morning, Sylvie, Annie, and I gathered at Erikia’s house for the August Charm Exchange. I couldn’t wait to see what everyone had brought, and our little group delivered handsomely with both well-crafted and gorgeous charms and a delicious potluck brunch. There were breakfast sandwiches and pastries from local shops, a yogurt parfait bar, a homemade raspberry gelatin, fresh fruit, a cheese and bread plate, and mimosas!
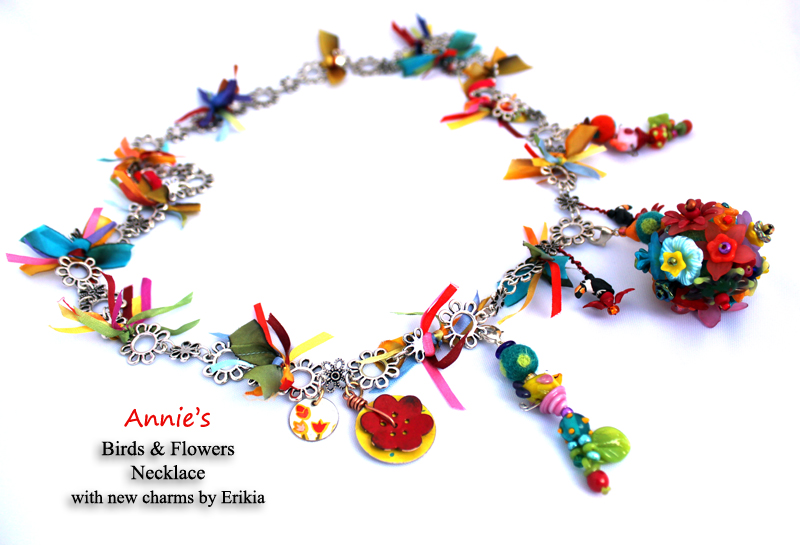
With our plates loaded, we headed to Erikia’s enchanting backyard where she had a table set up for us under her brand-new canopy. She’s very excited about using the new canopy at her booth in the upcoming Salida Fiber Festival, where she will be selling her vintage tin stitch markers. She’s done an amazing job preparing for the festival, punching out the markers from antique tins and then professionally finishing and stamping them. She used similar techniques to create her charms for Annie’s Birds & Flowers necklace. The red flower is made of copper, which she shaped into a curve before enameling it with powders and a torch to give it its vibrant color.
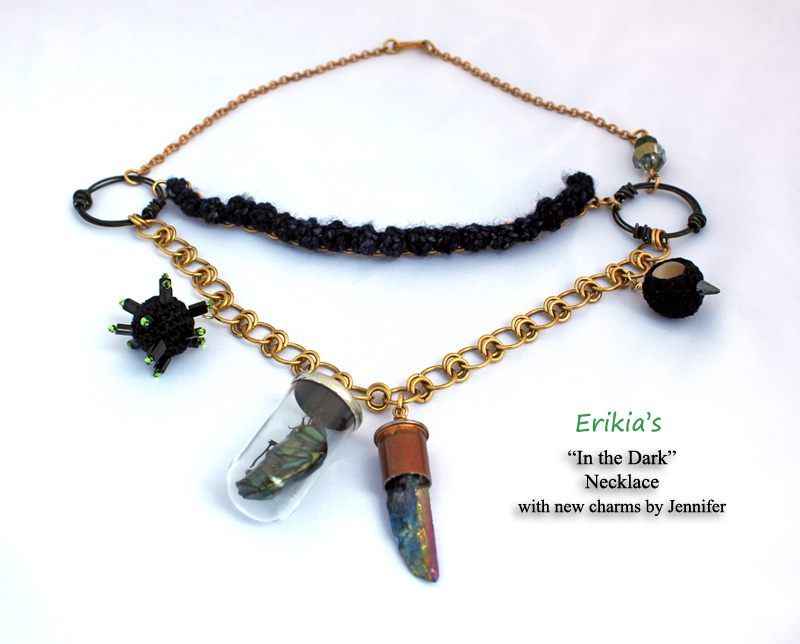
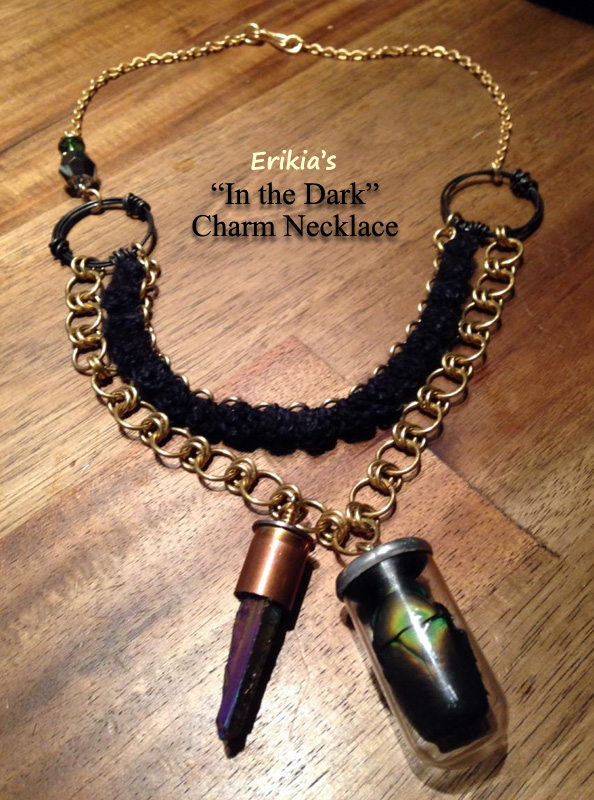
I crocheted my charms for Erikia’s In the Dark necklace using No. 10 crochet thread and a size 11 steel crochet hook. Working in this small scale presented a huge challenge for me. It took me several tries to get it right. For my first attempt, I crocheted the spider from the book Itty Bitty Crocheted Critters, but I didn’t really take the legs into account when I was working on the body. Although the body was only about an inch long, the legs made the whole thing over three inches! Then I tried just crocheting small balls to see what I could come up with. Stuffing these balls with Fiberfill revealed that I would need something sturdier inside to preserve their shape. I finally found some bronze-colored Bakelite beads in my stash that I thought would be a good fit both in size and color for Erikia’s necklace. I crocheted around the first bead and fastened off before it was completely covered, allowing the bead to show through. For the other bead, I ended up enclosing it completely and then sewing on small black and green beads to give it a spiky texture.
Rosalind used polymer clay to sculpt a mermaid charm and a squid charm for my Coral Reef bracelet. In the squid, she also added oxidized sterling silver chain and some gemstones. Even though she also found that working in this scale has its difficulties, I’m so impressed by all the detail she has managed to include in these charms. Keep in mind that they are under an inch long!
Sylvie created a tiny diorama inside a mini pocket watch for one of her charms for Rosalind’s Garden of Earthly Delights bracelet. It features a teeny baby with Monarch butterfly wings amid the moss of a forest floor. For her second charm, she brought new life to a piece of broken jewelry with the addition of colorful vintage floral beads.
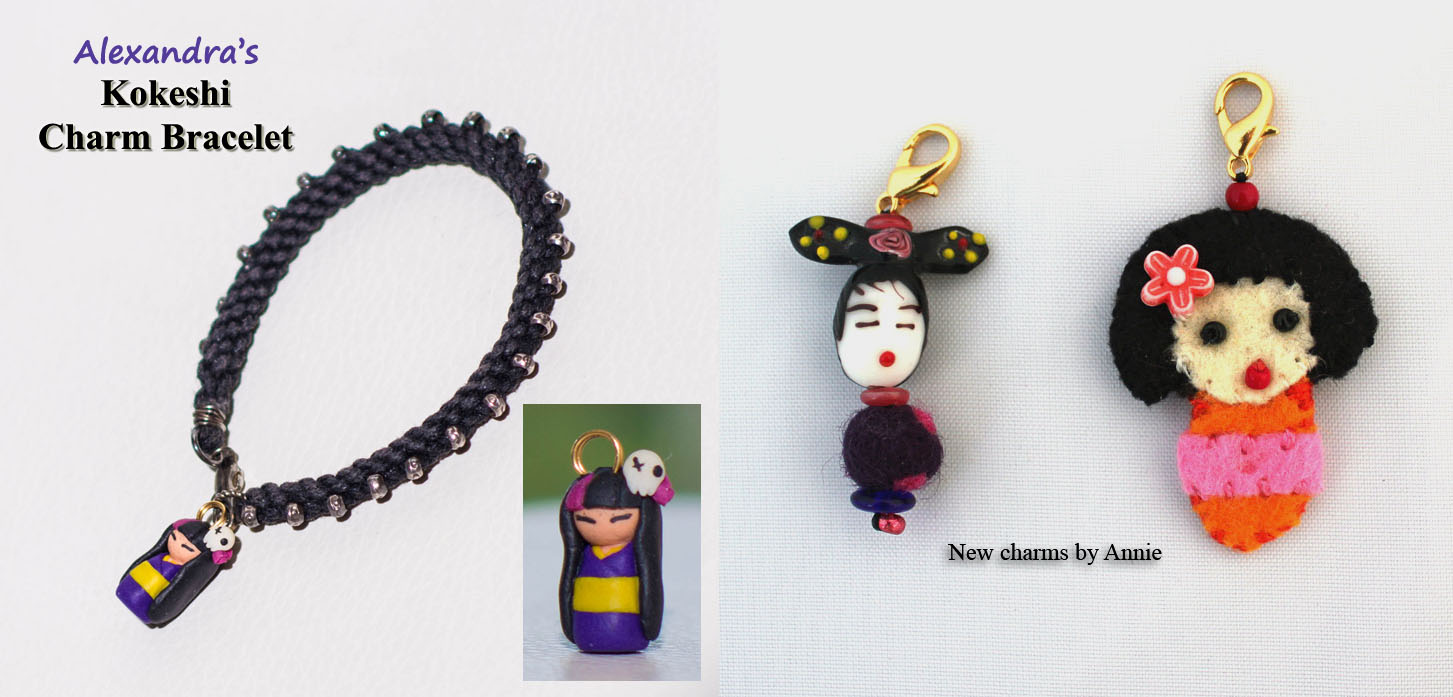
Rosalind and I weren’t alone in our struggle with scale. Annie agrees that making charms this tiny poses a challenge, but I think she succeeded handily with her felt and bead charms for Alexandra’s Kokeshi Doll bracelet. All of the stitching is painstakingly done by hand, and as always, Annie’s eye for color shines through.
Alexandra sculpted her charms for Sylvie’s Eye Adore You necklace in fimo. Most of her experience is with sculpting people or animals, so working with this subject matter was a challenge for her. It forced her to think outside the box, but it also left her inspired to start on the next set of charms right away!
These ladies have inspired me too. I can’t wait to get started on my charms for Annie’s Birds & Flowers necklace. We’ll be meeting again in October, and until then I think I will try working with lighter thread and a smaller hook to see what I can come up with. I might need to invest in a magnifying glass.
Last week I promised to tell you a bit more about the charm exchange I’m involved in and how it works. A charm exchange is a great opportunity to make jewelry, hone your skills and try out new techniques, learn from your fellow artists, and make new friends. I bet you’ll want to start an exchange too!
Here’s how it works. Everyone chooses a theme for their bracelet or necklace, and over the course of the year, each artist will make two charms for each person based on their themes.
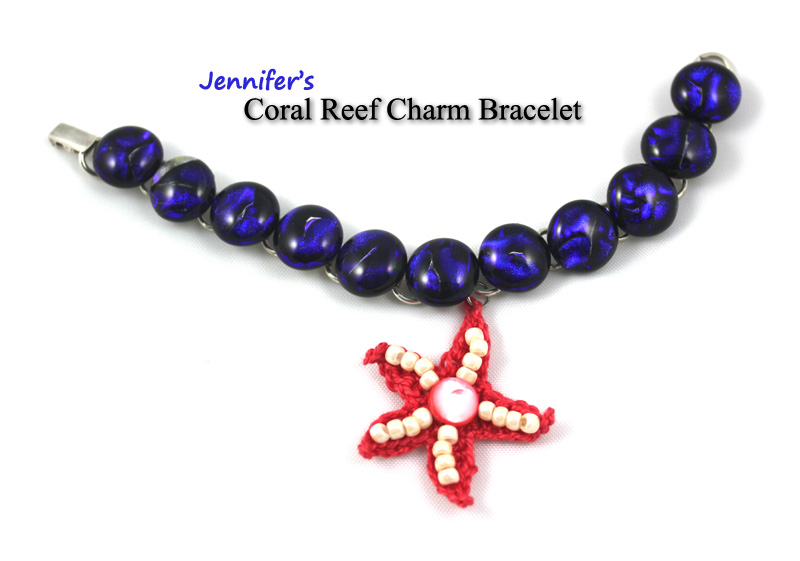
Maybe it will make more sense if I use myself as an example. I chose the theme coral reefs, so to start it off, I crocheted a starfish and attached it to my bracelet. At the first meeting, Annie worked up the exchange list (alphabetically ordered) and we all exchanged our necklaces and bracelets with each other. Now over the next two months, Rosalind will work on my bracelet, while I crochet charms for Erikia’s necklace. Erikia will work on Annie’s, Annie will work on Alexandra’s, Alexandra will work on Sylvie’s, and Sylvie will work on Rosalind’s. It’s a really good thing we have Annie to keep it all straight.
It will be so much fun to see how each piece progresses from beginning to end as we all add a bit of our handiwork. And I’m excited to be able to share our progress here with you. Are you excited to see what we’ve done so far? Here are some photos of everyone’s pieces at the start of the exchange.
Sylvie is really into eyes and hearts, which led her to create the clever theme “Eye Adore You” for her necklace.
Annie’s theme is birds and flowers. Can you spot all the birds and flowers she’s added so far?
Erikia’s theme is “In the Dark.” The charms Erikia created to start off her necklace include a bullet casing with an opal-colored glass crystal and a mini test tube with an iridescent green beetle inside.
Rosalind’s theme is “The Garden of Earthly Delights.” Bosch’s masterpiece will provide plenty of inspiration.
Alexandra’s theme is Japanese Kokeshi dolls.
My theme is coral reefs, including the animals and plants that call them home.
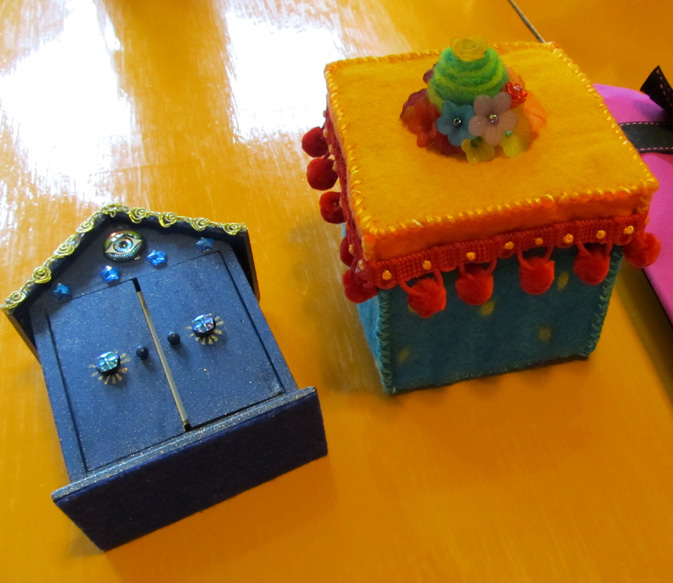
Sylvie’s box (left) for her “Eye Adore You” charm necklace and Annie’s box (right) for her Birds & Flowers charm necklace.
We can also make a box or bag, inspired by our theme, for our jewelry piece to travel from person to person in.
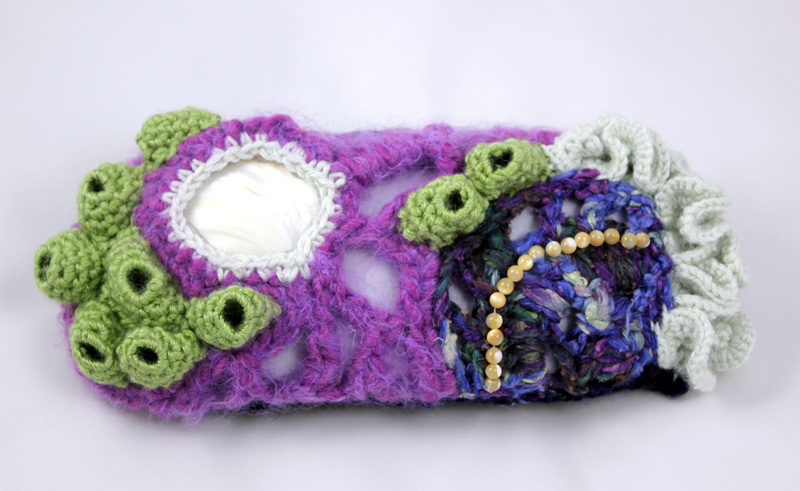
Sylvie and Annie made such nice boxes, I decided after the first meeting to try to make a box of my own. Inspired by the Smithsonian Crochet Coral Reef exhibit, I tried my hand at making a freeform crochet reef box. It was my first ever attempt at freeform crochet. You might guess, given my affinity for patterns, that this was a challenge for me, and it was at first. Eventually I was able to let loose and go wild. I’m not sure it’s a success, but it was sure fun to try.
A charm exchange is a great way to make fun things and make friends. You should start one too!
I have Erikia’s charm necklace next, so I’m off to crochet something dark and mysterious. Until next week… keep smiling, life’s a picnic. 🙂
 Charm exchanges are a blast! I had never even heard of a charm exchange before Sylvie approached me to be a part of hers. And I’m so glad that she did. It introduced me to a whole new world: I got to try mini-crochet for the first time, expand my jewelry-making skills, and meet a bunch of really great artists whom I can now call my friends.
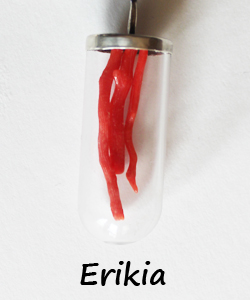 This being the charm exchange finale, I thought we might accomplish two things: (1) show off our final jewelry pieces to the world and (2) answer all your questions and provide advice on how you can start an exchange of your own, because seriously, you really should try this! Continue reading


You must be logged in to post a comment.