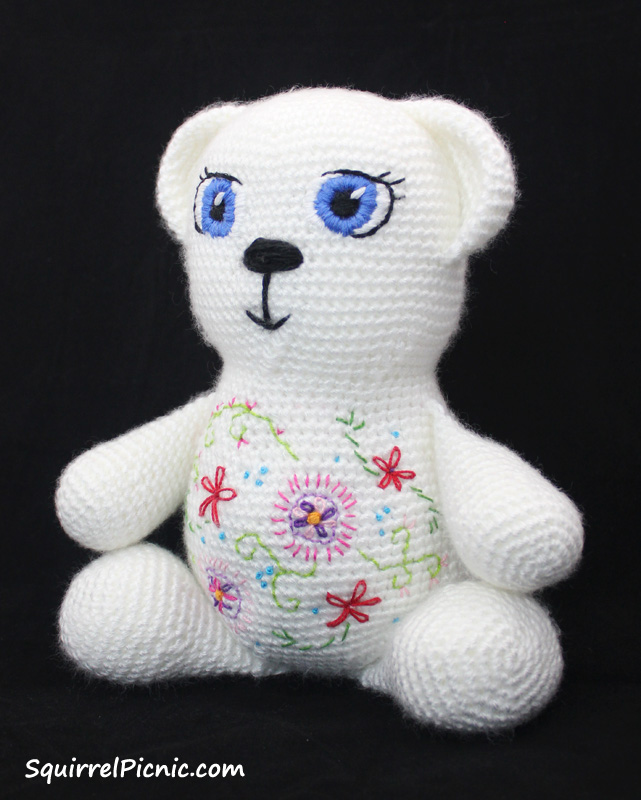
 I hope you enjoyed the tutorial last Friday on how to use satin stitch embroidery to give your amigurumi some spectacular looking eyes. I had a lot of fun stitching it, and to tell you the truth, I didn’t stop with the face. In this post I’ll tell you more about how stitch-crazy I went with this bear, and I’d like to also address all of you who asked me about where you can go to get lessons in embroidery. Continue reading
Category Archives: Crochet It

How to Add Faces to Your Amigurumi: Satin Stitch Embroidery
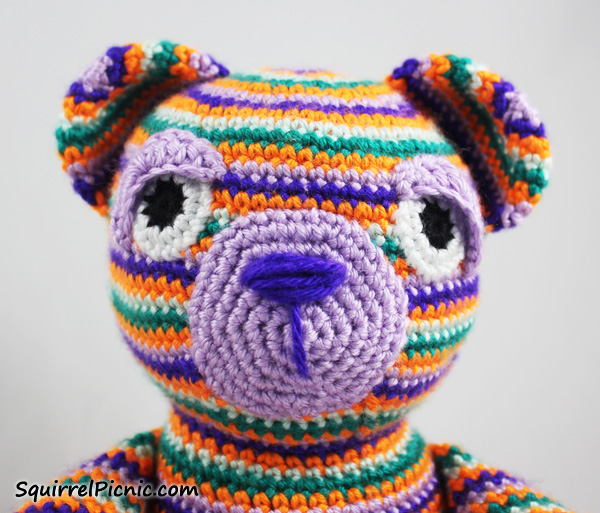
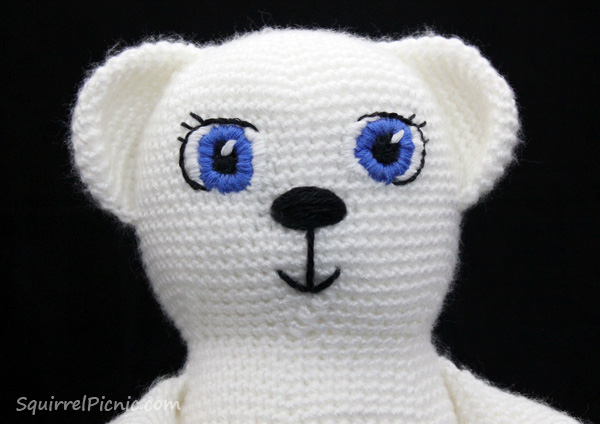 I love the look of satin stitch embroidery, but I don’t use it very often for my amigurumi because, I have to warn you, it does take longer to do than any of the methods I have shown you so far. It also takes a lot of focus, because you have to repeat the same stitch over and over again until an area is filled in. You will probably notice in this tutorial that by the time I got to the white part of the eyes, I had gotten a lot less picky about the straightness of my stitches. Looking back, I wish I would have taken a break halfway through or put the project aside for a day or so. Then I would have been able to come back to it fresh: fresh eyes, fresh mind. In the least, I hope you might learn from my mistake. If you find yourself growing frustrated or impatient, feel free to take a break. You certainly have my permission.
That aside, I think you will be pleased with the results you achieve by using satin stitch embroidery to add details to the faces on your amigurumi. I always think it looks very professional, as this is the technique most often used by large toy companies to manufacture stuffed animals for young kids. Satin stitch embroidery is a great choice for toys that will be used by children of all ages, because you don’t need to worry about any small parts that might present a choking hazard. While the big companies use machines to do all the work, I will show you how to do it by hand. After all, it’s the time and love that you put into it that makes a hand-embroidered stuffed animal so special.
Let’s begin! Continue reading
Thank you for sharing:

Spring Meadow Rug Crochet Pattern
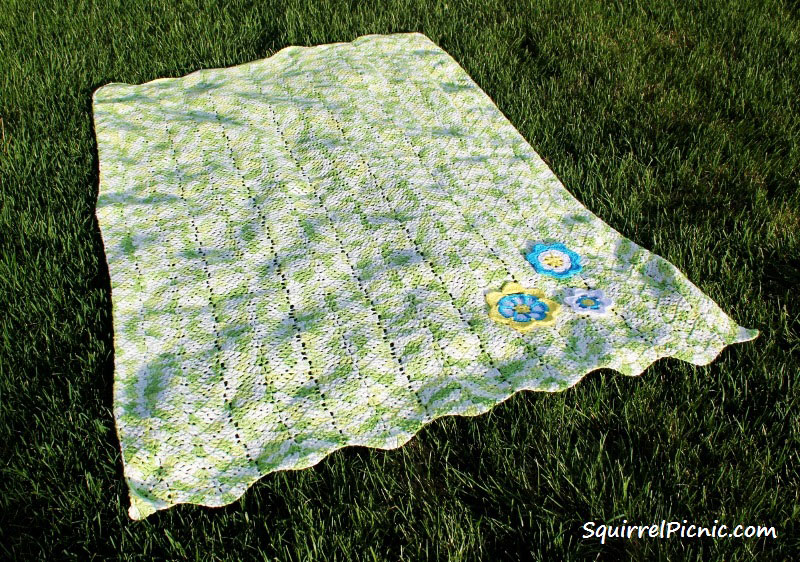 After a thorough cleaning of my bedroom/studio this spring, I decided to crochet a lively rug to cover my very blah carpet. When it came to picking the yarn for this project I knew I wanted a soft cotton, but I also wanted to try something new. I was really curious what a variegated yarn would look like in a chevron stitch pattern and I was ready to experiment.
I always love seeing the magic that happens with yarn of variegated colors. You never know quite what to expect. Sometimes, as with striping yarn, fun bands of color will appear. Other times you will get pools of color. It all depends on the yarn and the stitch pattern. So I was really pleased when this well-known and inexpensive cotton yarn created a mottled look when done up in a chevron stitch pattern.
Despite my breaking the rule against using variegated yarn with an intricate stitch pattern (I think that’s why most people use solid colors in this instance), I discovered with variegated yarn the chevron stitch pattern isn’t totally lost in the play of color. In the end, I think it creates a vibrant effect that you wouldn’t be able to achieve with solid color or stripes.
And now my floor is covered and the cotton feels divine under my bare feet, rather like a soft patch of spring grass.
Spring Meadow Rug Crochet Pattern
Thank you for sharing:

Motley the Bear Crochet Pattern
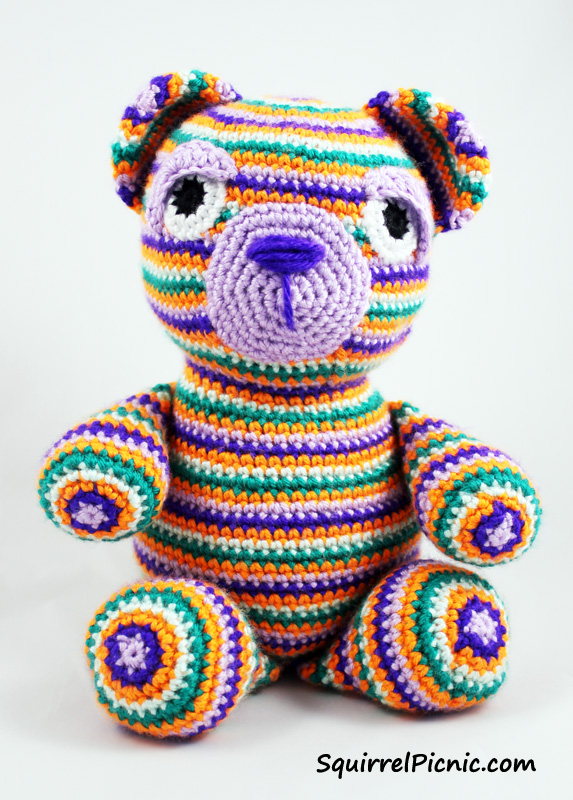 Introducing Motley Bear! I made this bear for one of my dear friends who was donating her kidney to a relative. I wanted to provide her with a bear that exuded confidence while at the same time bringing a lot of colorful cheer while she was recovering. I think Mr. Motley pulls it off nicely.
This bear pattern is based on my original Sleepy Bear pattern, with one obvious difference — he’s all done up in stripes.
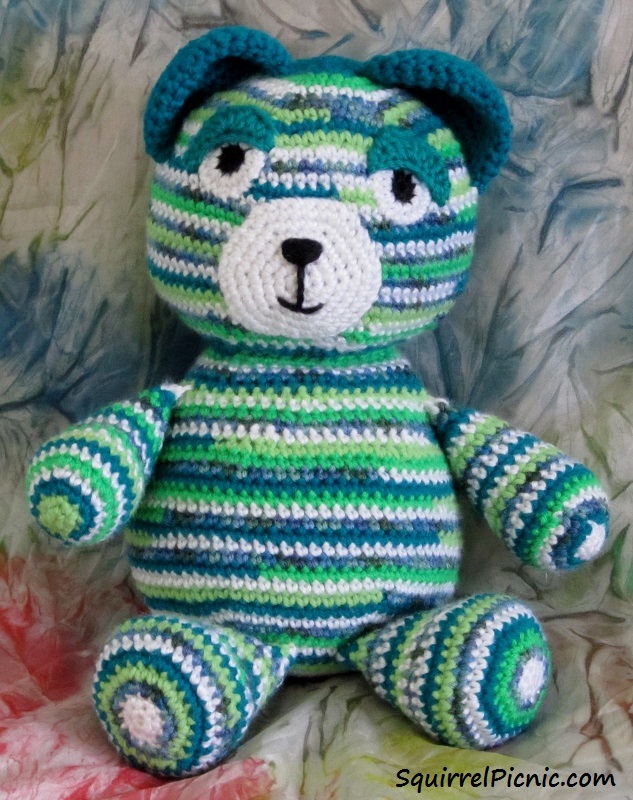 A striped bear provides a great opportunity to use up some leftover yarn too. I made this green bear out of odds and ends of green yarn that I collected over the years. I even have another bear that I am crocheting as I go, adding a round at a time as I gather leftover yarn from other projects. If you start a stash-busting bear like I have, my biggest word of advice is to pin a card listing your place in the pattern to your bear each time you put him aside so you’ll know where you left off when you pick him up again.
When I work in stripes like this, I prefer to end each round by joining with a slst and then chaining 1 with the new color to start the next round. By pulling on the strand for the previous color, it creates almost perfect, non-jogging rounds. They aren’t entirely perfect though. You still end up with a noticeable seam that spirals down the back, but I always just make sure that this part is at the back when I sew on the arms and legs and face. I prefer this method because I am too lazy to fasten off one color and attach the new one in each round. If you have a different method for changing colors in a striping pattern, by all means use it… and please share it with me! I am always up for learning new techniques.
Here are some other techniques you might try:
June Gilbank of Planet June has some great video tutorials for an invisible join (the one I mentioned above that I am too lazy to do), a no-cut join, and a hybrid of the two.
Needle Noodles has a great photo tutorial for two slip-stitch methods of color changing.
Motley the Bear Crochet Pattern
Thank you for sharing:

How to Add Faces to Amigurumi: Crochet Eyes and Eyelids
 To crochet the eyes, nose, and mouth seems like the obvious way to add a face to your amigurumi, but I have to admit that it’s the method I use least often. I usually opt for embroidery or safety eyes, but after putting together this tutorial, I know I will turn to this method more often. I hope you will too!
In fact, there are three things I have discovered most appealing about these crocheted eyes: (1) they are easier and faster to make for larger toys than embroidery; (2) they are ideal if you are making the toy for a child, because as long as the pieces are sewn on securely, they won’t present a choking hazard; and (3) you can play with the placement of the eyelids to create a very unique look. A lot of a toy’s personality depends on how you place the eyelids. If you want the toy to be dopey, place them farther back on the eye. If you want him to be happy, place them directly above the eye. If you want him to be angry, place them farther forward. Have fun playing around with the placement to see what expressions you can create.
In this tutorial I used worsted-weight yarn and a G-6 (4.00 mm) hook to crochet the eyes and eyelids for a 10-inch teddy bear. If you are making eyes for a smaller amigurumi, like my squirrel for instance, you might try using crochet thread and a steel hook size 00 or smaller. If your amigurumi is a size somewhere in between those two, you might play around with different yarn weights and hooks to get the eye size you desire.
Grab your hook and some yarn in black and white and the color of your choice for the eyelids. You’ll also need a pair of scissors and a yarn needle. Let’s begin! Continue reading
Thank you for sharing:

Crochet Purse or Satchel for Your Squirrel Friend
 The latest comic featuring Hodge, Podge, and Eric showed how much these squirrels love their new bags! Hodge likes to carry all of his craft supplies with him everywhere he goes, because you just never know when you’ll need a sewing machine or your knitting basket. Podge, on the other hand, likes to travel light and only carries a tube of lipstick. I’m more like Hodge — I carry a backpack filled with crochet projects and tools every day! Do you have craft supplies in your bag right now?
If your squirrel has lots of stuff, he or she is going to need a purse or satchel too. Crochet one today with this free pattern. It’s quick and easy! Decorate their bag with embroidery or beads. Use chain or ribbon for the strap. These are just a few suggestions. Feel free to get creative and customize it to your squirrel’s personal style.
If you haven’t made a squirrel amigurumi yet, you really should! They are so much fun to have around. Visit my free pattern to make a Hodge or Podge of your very own. Continue reading


You must be logged in to post a comment.