Jelly Belly Bunny is ready to visit your home for Easter! No, she’s not the Easter Bunny. She’s more the Easter Bunny’s awkward sister, the one who finds and eats all the Easter Bunny’s candy before anyone else gets a chance. She’s a hoot to have around, but you’ve been warned, you’ll need go out and get more candy.
I like to think that we’re all designers in some way or another. Whether creating a beautiful work of art, a computer program, a tool, or even a sandwich, each of us creates unique things every day through the design decisions we make. So when you go about creating something new, where do you begin? Do you start with a pen and pad of paper or a digital sketchbook? How do you choose your materials? How do you make your imaginings real? I’ll share a bit of my own rather scattered course of action, but I’d love to hear about your process too!
For this blanket I had a lot of decisions to make: yarn weight, brand, color, fiber content, quantity, and price, to name a few. So here is how I decided what Sleepy Zs are made of.
A Big, Big, Big World of Yarn
There are so many yarns out there. How will I ever decide which one is right? When I have a design decision to make, I try to remember these things:
Keep an open mind.
Try not to get too attached to one solution or you might miss seeing easier, more interesting, or more elegant solutions.
Ask your friends. Special thanks to all of mine! (Especially my Squirrel Picnic friends on Facebook who weighed in on this very topic with some excellent yarn suggestions.)
Research, and more research.
Trust your instincts… and your sense of style. If it makes you feel good, go for it. If something feels off, it probably is!
Don’t shop for yarn without a list of what you’re looking for.
Ask yourself, what characteristics of the concept, pattern, and material are most important to me?
I’ve been thinking of this Sleepyz Blanket for a while now. After pondering over the design and discussing with Shelby about what the Sleepy Z should look like (he convinced me it should be Z-shaped and not more… globular), I think I’m ready to answer that last question.
What characteristics are most important for this yarn to have?
1. It needs to be super soft.
2. It should be thick worsted, probably Aran weight.
3. It should be a little fuzzy, but not so much that it will be hard to work with.
4. The yarn family should have a respectable color palette of at least 15 options.
5. It should be carried locally so that I can feel/test it out and so I can get more in case I run out.
I weighed a lot of yarns against these standards and consulted with a lot of people and websites before I finally made a decision. My Sleepy Zs will be made of… drum roll, please… Blue Sky Alpaca Worsted Weight Cotton!
Phew, I’m glad that’s done.
I Love You, Pantone
Now to decide on colors.
I don’t know about you, but the crochet blankets that generally catch my eye have several colors that work together in subtle ways, usually through the stitch pattern or motif. Color combinations can be gleaned from anywhere. Nature is usually my favorite source, but every year when Pantone announces their color palettes for that year, I get a little giddy about the idea of using some of their colors in a crochet project. When I saw the 2014 Pantone spring fashion colors, I instantly fell in love with this combo.
And it turns out, Blue Sky Alpaca offers quite similar colors in cotton. Yippee!
Aloe (604)
Thistle (603)
Stone (626)
Mediterranean (632)
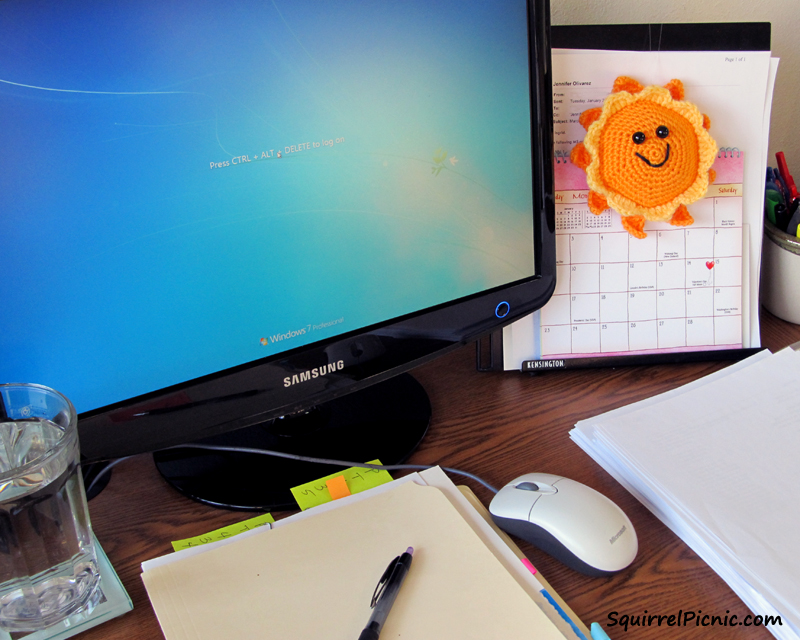
I had a feeling that with the addition of a cool white (Drift – 614), these colors would really shine together. I have several ideas on how the Zs could be sewn together in the end, but I don’t think I will know for sure until I have a bunch of them made and I can play around with the configuration. Because I’m going to be crocheting Zs in solid colors, the blanket’s layout will probably be some form of a striped pattern. So I put together a quick visual by taking a screen shot off the yarn.com website to help me see how these might “play” together. Not too shabby… what do you think?
When It Comes to Yarn, There’s Never Too Much (How to Make Extreme Ballpark Guesstimates)
I really don’t know if there’s a logical way to determine how much yarn you will need for a project that has never been made before. I haven’t even created the pattern for a Z. Perhaps I should do that first — but wait, I need the yarn first. Oh, yarn, you got me again!
So there’s only one thing I could think of to do. I used Ravelry to determine about how much yarn I might, maybe, possibly need. I looked up patterns and projects that had been made using Blue Sky Alpaca cotton that were roughly the size of what I hoped my blanket would be. In the end, I bought 13 skeins, but I’m thinking I might need more. Luckily, I know where to find it at my local yarn shop.
The next step is one of my faaaa-vorrrr-ite tasks. Winding the yarn into balls! I’ll go get my swift and winder and meet you back here later, okay?
Have you ever felt so tired that you just couldn’t shake the sleepiness off you no matter how hard you tried? According to a theory I’ve been working on, you were being attacked by a horde of benign but persistent critters called the Sleepyz. (I should clarify: One all by himself is a rare occurrence, but when it happens, he’s called a Sleepy Z. Together they’re called the Sleepyz.) These cute, woolly, Z-shaped guys exist for only one purpose, and that’s to get you back to bed.
Preliminary sketch of a Sleepy Z.
When you wake up in the morning, you are literally covered in them. You throw back the blankets, and although the Sleepyz may scatter for a moment, they catch you by the pajamas and try to pull you back in, making it so difficult to crawl out of bed. The best defense against them, especially first thing in the morning, is caffeine. It’s like Kryptonite to the buggers. But as soon as the caffeine wears off, they’re right back at your heels, climbing up your legs and making them feel like lead. Once you have enough of them climbing around on you, they join forces, stitching themselves together like a blanket. Eventually all you can do is close your eyes and give in, snuggled under a warm and cozy blanket of Sleepyz.
The Sleepyz are generally invisible. That’s why I think it’s very important for me to bring them to life in crochet for everyone to see. And that’s exactly what I’m doing for my next project here at the picnic: The Sleepyz Blanket. Just like in the story, the blanket will be made of a bunch of crocheted Zs that get sewn together. I’ve already begun creating an original pattern for a Z motif and I can’t wait to show you! Until then, the image at right might give you an idea of what I’m thinking of for each Sleepy Z.
I hope to be able to document and share the whole process with you, from concept development through to the final blanket. In addition to seeing how I create the pattern, you’ll be in on my process as I choose colors, decide on a layout, and crochet the Zs. Finally, I’ll present it all as a free pattern, so you can create a Sleepyz Blanket of your very own.
About a month ago, my friend Vanja published a crochet pattern for a very cute Mooshka Doll on her AmigurumiBB blog. To be honest, I had never seen a Mooshka Doll before. I thought surely this was a doll that Vanja had made up or one that came from Croatia where she lives. They are irresistibly adorable and undeniably huggable. I had to make one!
For those of you who already know what a Mooshka is, I should explain: when I made my own, I got caught up in crocheting the doll and I forgot about some of the key “Mooshka” elements like the big, round eyes and colorful striped stockings. Now that I look at her, I think she really needs some colorful hosiery.
It wasn’t until after I was finished that I decided to research the origins of the Mooshka. It was a little disappointing to find that the doll didn’t originate in Eastern European folklore, but instead with MGA Entertainment (the makers of Bratz), but she’s still really adorable and she has a good message. According to the website, their story goes like this: a group of paper dolls joined hands and, by the power of friendship, became real girls. They can be bought at Target in the US or made using AmigurumiBB’s fantastic and free pattern.
I would, of course, recommend making one of your very own using Vanja’s pattern. My favorite part was making the hair! It’s crocheted in one separate piece, done in rows that part around the face. You add two little buns to the sides after you sew the hair on. It’s quite cute!
The only trouble I had was with the placement of the arms, but in talking it over with Vanja, we were able to work it out. If after you are done with the head and ready to start the arms, you notice that you are at the front of the body (the head will be horizontal like a flat sewn doll), instead of continuing with the pattern, fasten off your yarn. Then flatten the chest so that you can find the side center stitch. Count 7 stitches back from this, and reattach your yarn there. Count 15 stitches forward (including the stitch where you attached your yarn), and single crochet those 2 stitches together. Continue with the pattern in rounds to create the arm. Repeat for the opposite arm.
The pattern will completely impress you. The hands are elegantly simple. The body is beautifully shaped. And I’ve already mentioned how much I love the hair. You can embroider the facial features as I did or use Vanja’s pattern for those big, beautiful Mooshka eyes.
I have a feeling every little girl is going to want one. Vanja, you really have your finger on the pulse of the American toy industry! Kudos for that and especially for providing this wonderful pattern. Have fun making your Mooshka dolls, everyone!
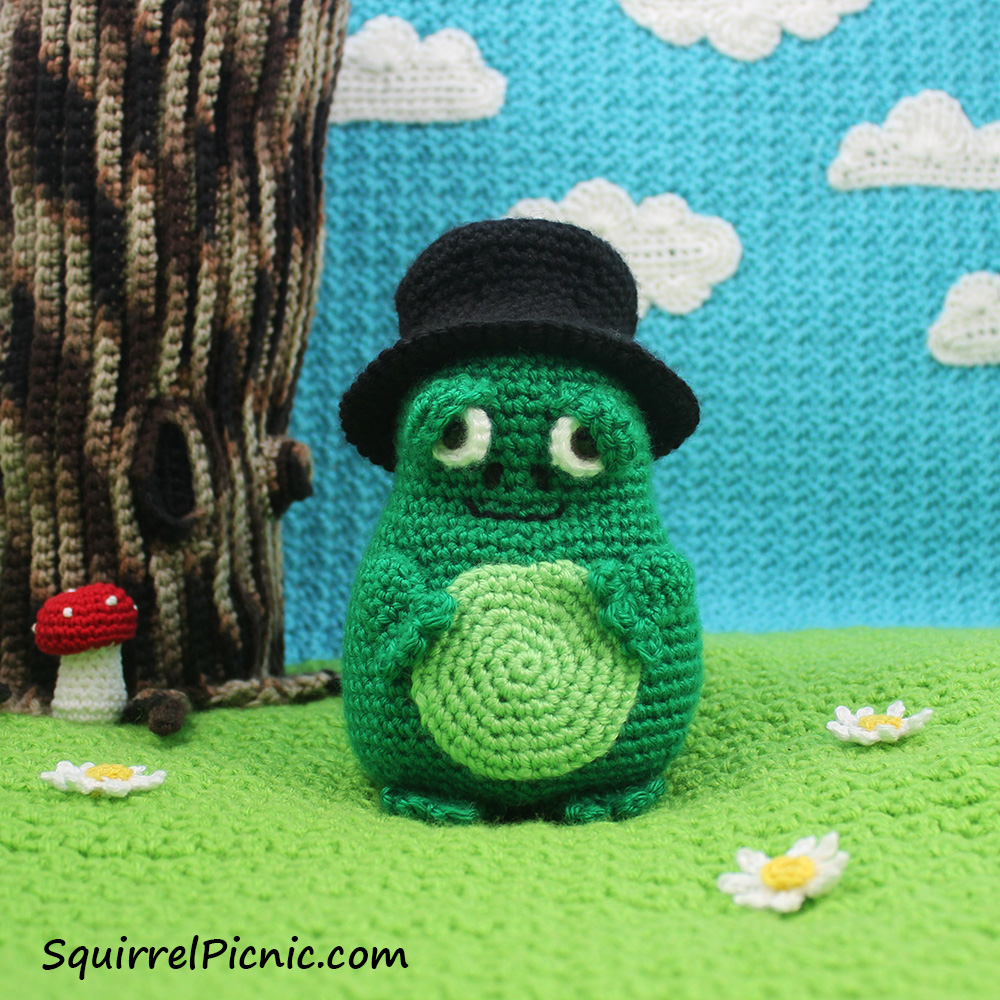
Mayor Snack Frog was the very first fatimal I ever crocheted. What’s a fatimal, you ask? A fatimal is, well, a fat animal. And at Squirrel Picnic, the fatimal clan is a bunch of fun-loving, easygoing, party animals. From their embroidered noses to their tiny little hands and feet, there’s just so much to love about them. They never consider their size to be a disadvantage. They never let anything get them down — they’re too busy having fun.
Of all the fatimals, Mayor Snack Frog could be considered the leader, but the truth is that there’s not really an organization to lead and fatimals aren’t much for being led anyway. In fact, he’s the one who gave himself the title of mayor. No one else seems to mind, so what the hoot. He has friends from all over the world who sometimes stop by to visit. He really does know how to throw a good party.
Finished size without top hat: 6″ tall and 11 1/2″ around at the widest point
Finished size of top hat: 2″ tall and 12″ around the outside of the brim
Materials
(A) 85 yds worsted-weight yarn in green (Caron Simply Soft in Dark Sage, 6 oz [170 g] / 315 yds [288 m])
(B) 32 yds worsted-weight yarn in black (Caron Simply Soft in Black, 6 oz [170 g] / 315 yds [288 m])
(C) 5 yds worsted-weight yarn in light green (Caron Simply Soft in Pistachio, 6 oz [170 g] / 315 yds [288 m])
(D) small amount of worsted-weight yarn in white (Caron Simply Soft in White, 6 oz [170 g] / 315 yds [288 m])
G-6 (4.00 mm) crochet hook
Size 12 mm safety eyes
Polyester Fiberfill
Tapestry needle
Gauge
5 sts = 1″
5 rows = 1″
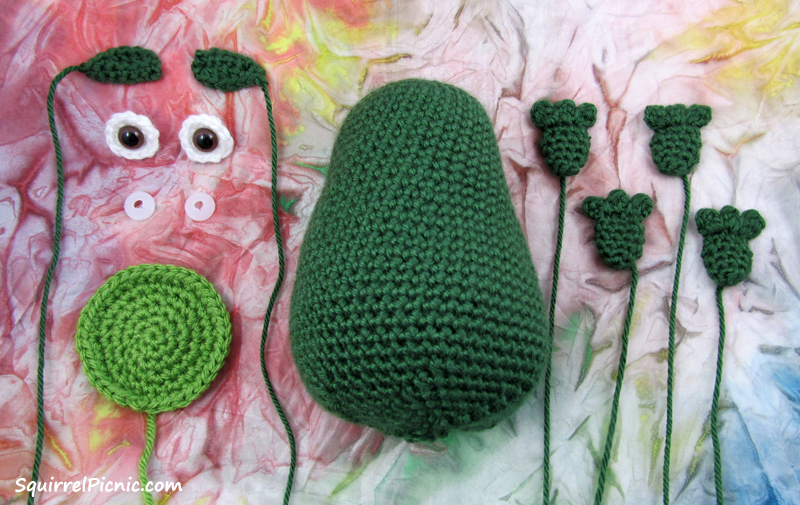
Instructions
Eyes (Make 2)
With D, ch 2.
Rnd 1: 6 sc in 2nd ch from hook.
Rnd 2: 2 sc in ea sc around, join with slst. (12)
FO. Weave in ends.
Set aside for now.
Eyelids (Make 2)
With A, ch 7.
Row 1: Sc in 2nd ch from hook and ea ch across (BL only is ok), ch 1, turn. (6)
Row 2: Sc, hdc, dc, hdc, sc, slst.
FO, leaving long tail for sewing.
Set aside.
Body
With A, ch 2
Rnd 1: 6 sc in 2nd ch from hook. (6)
Rnd 2: 2 sc in ea sc around. (12)
Rnd 3: * sc, inc, rep from * 5 more times. (18)
Rnd 4: * 2 sc, inc, rep from * 5 more times. (24)
Rnd 5: * 3 sc, inc, rep from * 5 more times. (30)
Rnd 6: * 4 sc, inc, rep from * 5 more times. (36)
Rnds 7-15: Sc in ea sc around.
Rnd 16: * 5 sc, inc, rep from * 5 more times. (42)
Rnd 17: Sc in ea sc around.
Rnd 18: * 6 sc, inc, rep from * 5 more times. (48)
Rnd 19: Sc in ea sc around.
Rnd 20: * 7 sc, inc, rep from * 5 more times. (54)
Rnds 21-30: Sc in ea sc around.
Rnd 31: * 7 sc, dec, rep from * 5 more times. (48)
Rnd 32: * 6 sc, dec, rep from * 5 more times. (42)
Rnd 33: * 5 sc, dec, rep from * 5 more times. (36)
Rnd 34: * 4 sc, dec, rep from * 5 more times. (30)
Rnd 35: * 3 sc, dec, rep from * 5 more times. (24)
Insert safety eyes into the center of the white eyes and attach to head. Sew eyelids to the frog’s head so that it wraps around the white part of the eye.
Stuff frog lightly.
Rnd 36: * 2 sc, dec, rep from * 5 more times. (18)
Rnd 37: * Sc, dec, rep from * 5 more times. (12)
Rnd 38: * Sk, sc, rep from * 5 more times. (6)
Join with slst. FO, leaving a tail. Thread tail through remaining sts and pull to close. Weave in end.
Nose and Mouth
Using B, embroider two French knots for the nose and using a back stitch embroider a smile for the mouth.
Using C and back stitch, embroider an M above the nostrils and a line below the mouth to outline a snout.
Belly
With C, ch 2
Rnd 1: 6 sc in 2nd ch from hook.
Rnd 2: 2 sc in ea sc around. Slst in 1st sc to join. (12)
Rnd 3: Ch 1, * sc, inc, rep from * 5 more times. Slst in 1st sc to join. (18)
Rnd 4: Ch 1, * 2 sc, inc, rep from * 5 more times. Slst in 1st sc to join. (24)
Rnd 5: Ch 1, * 3 sc, inc, rep from * 5 more times. Slst in 1st sc to join. (30)
Rnd 6: Ch 1, * 4 sc, inc, rep from * 5 more times. Slst in 1st sc to join. (36)
FO, leaving long tail for sewing.
Sew to the middle of Mayor Snack Frog’s belly.
Feet and Hands (Make 4)
With A, ch 2.
Rnd 1: 4 sc into 2nd ch from hook. (4)
Rnd 2: 2 sc in ea sc around. (8)
Rnds 3-5: Sc in ea sc around.
Tuck in ends and press flat.
Row 6: Sc this closed with 3 scs (skipping the sts on either end where it is folded). Turn. (3)
Row 7: Ch 2, 2 dc in each of next 2 sc, (2 dc, ch 2, slst) in last sc.
FO, leaving a tail for sewing.
With the tail, thread through the 1st of the 3 sc in Row 6. Pull the thread up and over the dcs in Row 7 and back through the same space. Then thread through the 3rd sc in Row 6. Pull the thread up and over the dcs in Row 7 and back through the same space. Weave in to secure, but don’t trim just yet. (You’ll use the rest of the tail to sew the arms and legs to the frog.)
For feet, sew two of these to the bottom of the frog so that the toes stick out from under his belly. For hands, sew two of these to the sides of the frog so that the fingers reach out just in front of his belly.
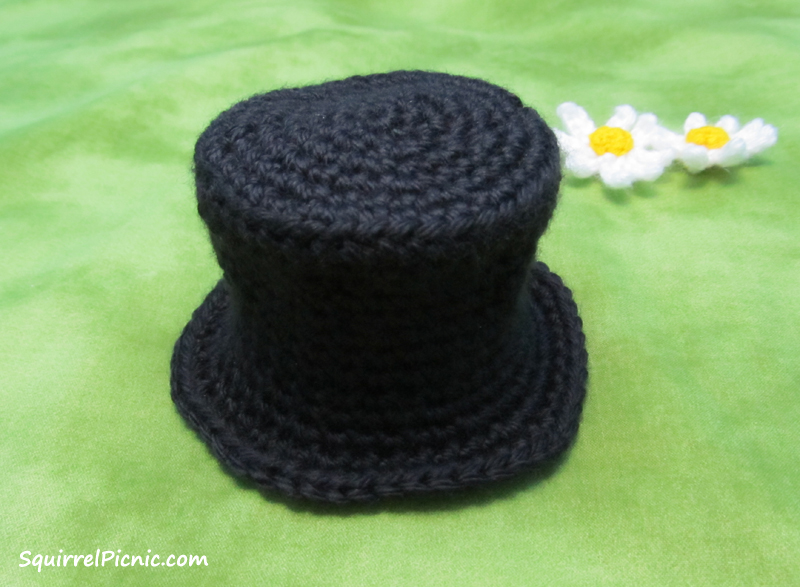
Top Hat
With B, ch 2.
Starting at the flat top of the hat:
Rnd 1: 6 sc in 2nd ch from hook.
Rnd 2: 2 sc in ea sc around, join with slst, ch 1. (12)
Rnd 3: * sc, inc, rep from * 5 more times, join with slst, ch 1. (18)
Rnd 4: * 2 sc, inc, rep from * 5 more times, join with slst, ch 1. (24)
Rnd 5: * 3 sc, inc, rep from * 5 more times, join with slst, ch 1. (30)
Rnd 6: * 4 sc, inc, rep from * 5 more times, join with slst, ch 1. (36)
Rnd 7: * 5 sc, inc, rep from * 5 more times, join with slst, ch 1. (42)
Moving on to the sides of the hat:
Rnd 8: Sc in BL only of ea sc around.
Rnd 9: Sc in ea sc around.
Rnd 10: * 5 sc, dec, rep from * 5 more times. (36)
Rnd 11: Sc in ea sc around.
Rnd 12: * 4 sc, dec, rep from * 5 more times. (30)
Rnds 13-15: Sc in ea sc around, join with slst, ch 1.
To create the brim:
Rnd 16: Sc in FL only of ea sc around, slst, ch 1.
Rnd 17: * 4 sc, inc, rep from * 5 more times, join with slst, ch 1. (36)
Rnd 18: * 5 sc, inc, rep from * 5 more times, join with slst, ch 1. (42)
Rnd 19: * 6 sc, inc, rep from * 5 more times, join with slst, ch 1. (48)
Rnd 20: * 7 sc, inc, rep from * 5 more times, join with slst, ch 1. (54)


You must be logged in to post a comment.