 It has been quite an honor to be a part of a charm exchange with such talented artists. I have learned a lot about both small-scale crochet and about jewelry making. Most of all I learned that practice does make perfect. If there’s a skill you want to improve, there is one well-trodden path to success — you simply must keep doing it… over and over again. It’s the same as when we were little and our parents nagged us about practicing our musical instruments or our times tables.
With jewelry making, I have had to learn how to make wrapped loops over a dozen times, because I will learn it one day and then not even pick up my pliers for months. Having this charm exchange has given me an excuse to practice and I really think I may have gotten it this time!
The same is true for tiny crochet. I had to really practice and practice. It takes time and patience, but in the end I was rewarded with a new skill and a broader understanding of crochet. If you are interested in taking up mini-crochet, I’d like to help get you started. Let’s take a trip down memory lane and see how far I’ve come, while I share with you what I have learned.
Charm #1: Starfish for My Coral Reef Bracelet
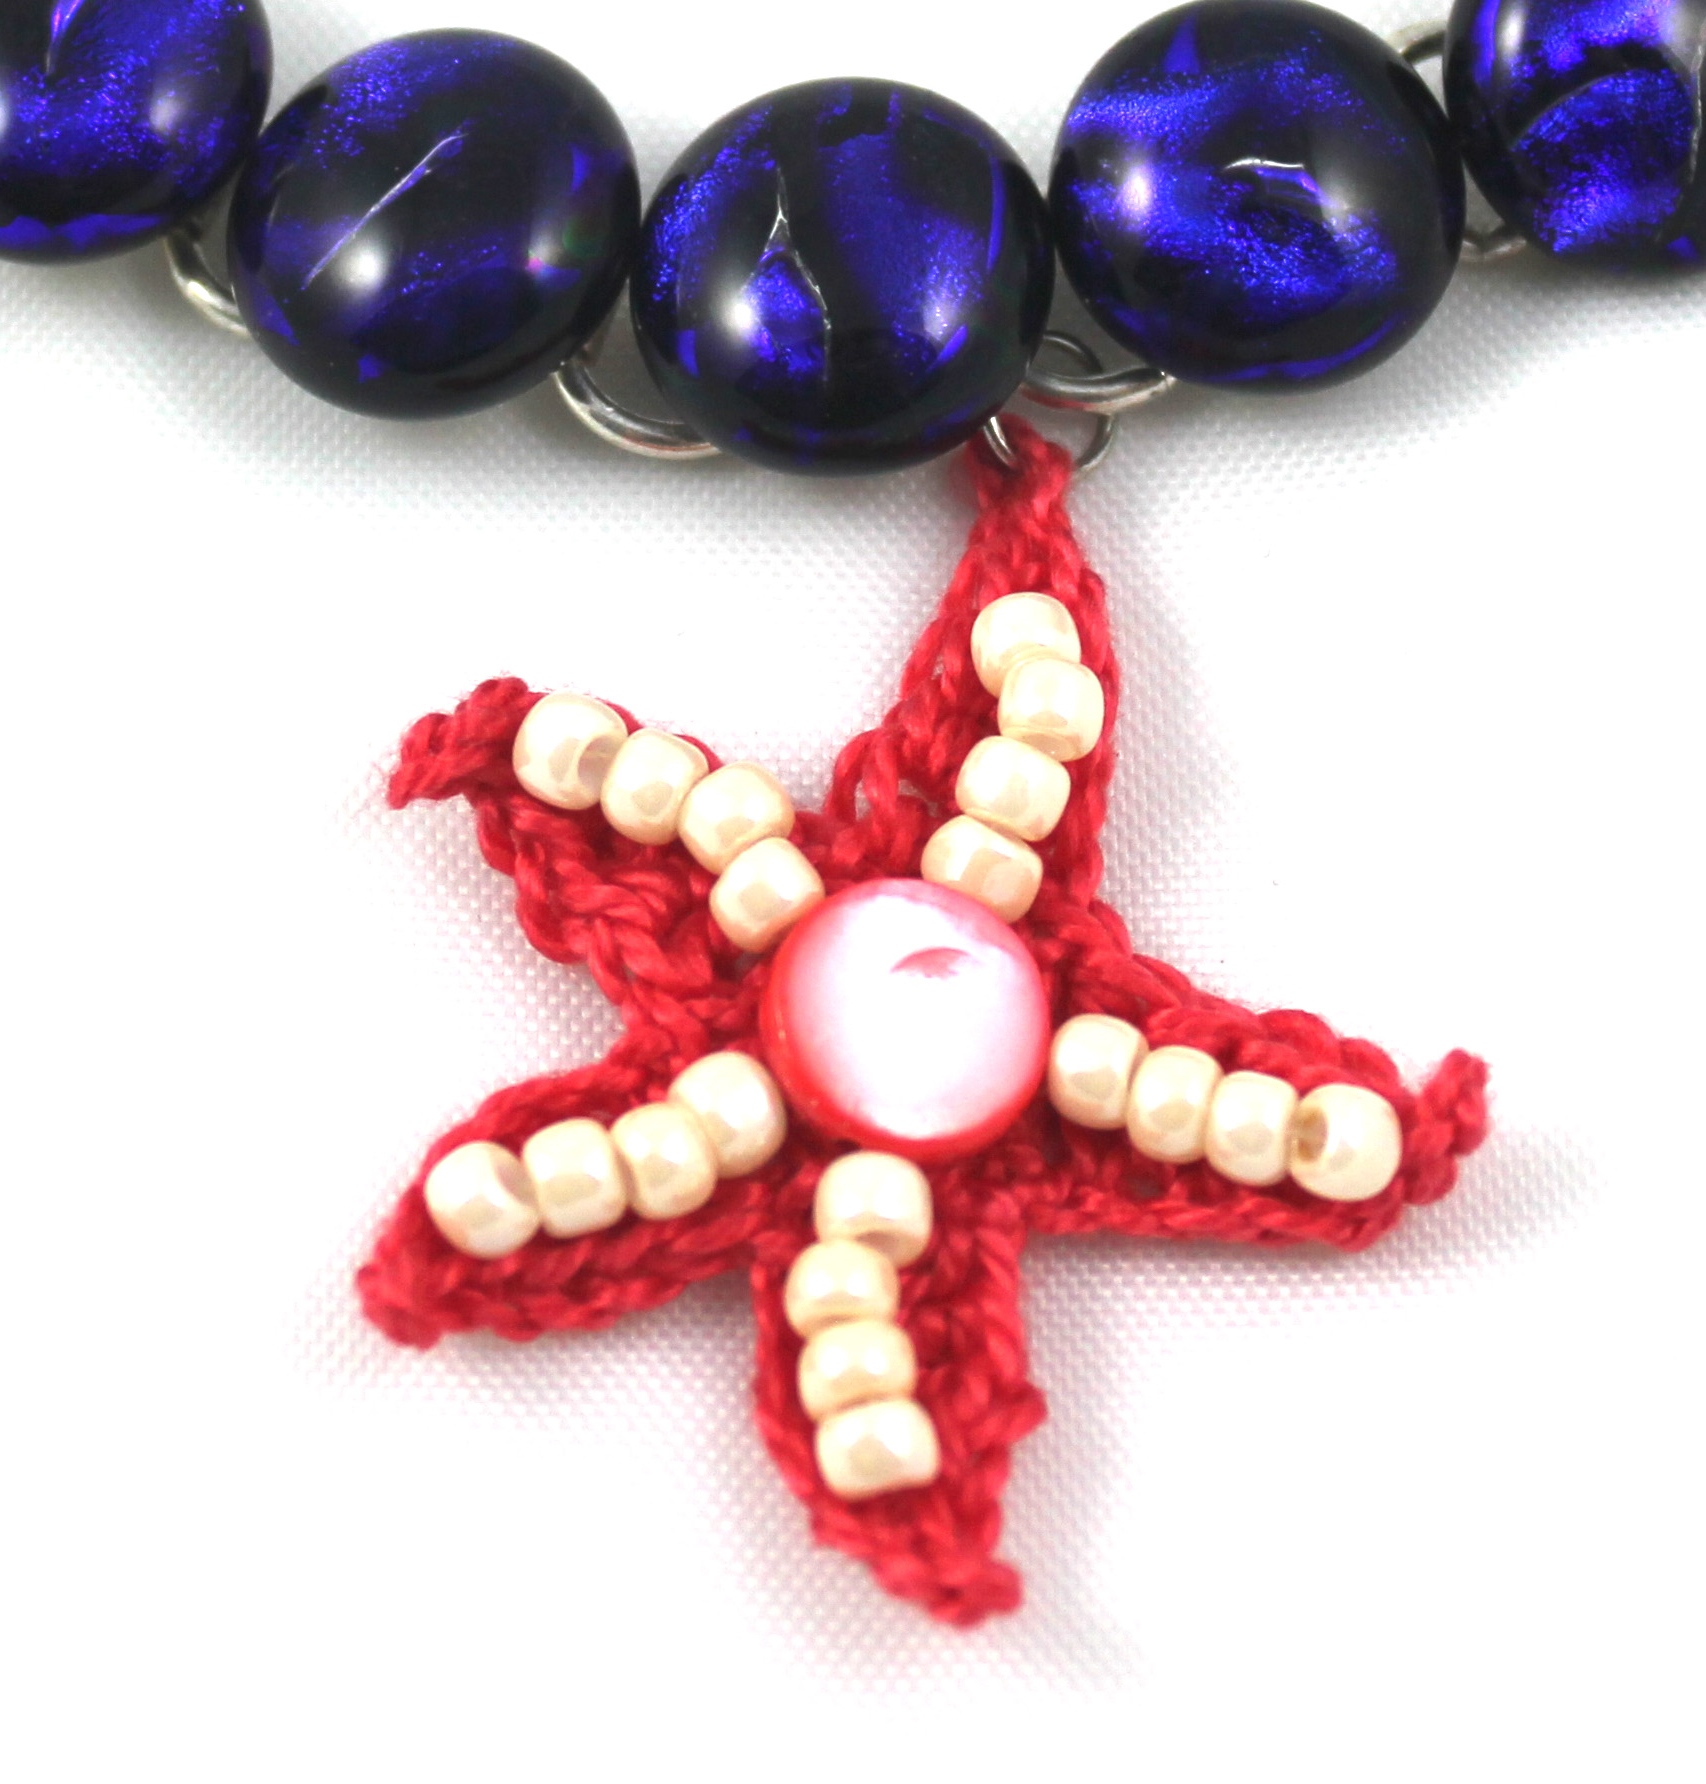 This starfish was my third or fourth attempt to crochet something with cotton thread. I tried to crochet a ball, with the hopes of making an urchin. I thought that would be easier, but I found it hard to make my fingers work. You have to hold the piece with the tips of your fingers, while working your crochet hook into the tiny stitches with the other. I think that’s what is the hardest thing to get the hang of. It’s also why it is good advice to work your way down from worsted- to sport- to lace-weight yarn, before trying to tackle crochet thread.
In the end, I found it easier to crochet a flat motif like this starfish than the ball. Perhaps you might try a flat motif to start as well.
Charms #2 and #3: Charms for Erikia’s “In the Dark” Necklace
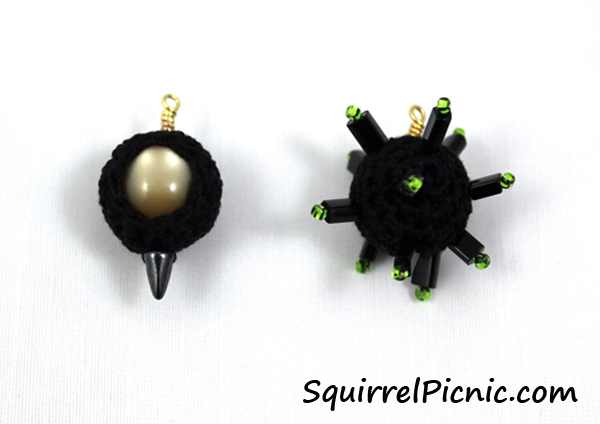 Since I had had such a terrible time crocheting a ball, I set out to master it with this exchange. I discovered that it helps to hold your work between your thumb and your pointer finger (with your pointer finger inside the opening as it is created), then you can crochet against your finger and turn the piece as you go.
I found with this exchange that using something solid inside the charm will help it keep its shape much better than filling it with polyester stuffing. About halfway through crocheting these balls, I would insert the bead and continue to crochet around that. Once you have inserted the bead, the final rounds to close up the ball are pretty easy.
Charms #4 and #5: Charms for Annie’s “Birds and Flowers” Necklace
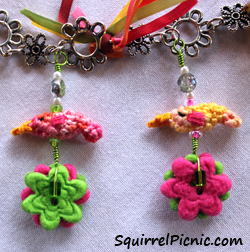 During the time between these two exchanges, I practiced my tiny crochet skills by crocheting some of the charms in the books Mini Amigurumi by Sara Scales and Itty Bitty Crocheted Critters by Erin Clark. Doing this helped increase my confidence in crocheting on a small scale. This was great! I felt up for a challenge. For Annie’s necklace, I decided to adapt a crochet pattern for a 7” bird (the Bower Bird by Attic24) down to less than 1”. And by goodness it worked!
Charms #6 and #7: Charms for Alexandra’s “Kokeshi Doll” Bracelet
 These kokeshi doll charms were a lot of fun to do, but I was pretty amazed at how long it actually took me to make them. All in all, I think it took about four or five hours. I’m really happy with how they turned out. Crocheting these kokeshi dolls and the other patterns in the Mini Amigurumi book showed me that when you are crocheting items this small, you don’t need a lot of detail. For instance, two simple line stitches are enough to create eyes and a long line is enough to mark the edge on a kimono. “Keep it simple” was a phrase that popped up in my head often. And my next charm would be a test of my understanding of that.
Charm #8: Eyeball for Sylvie’s “Eye Adore You” Necklace
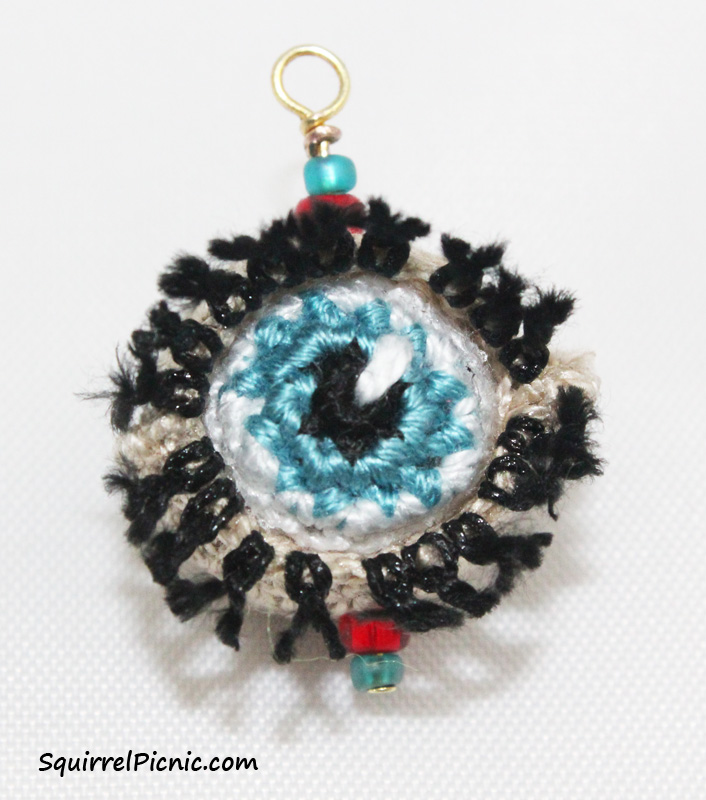 I had big ideas for an eyeball for Sylvie’s charm necklace. I wanted it to be able to turn, either within a crocheted eye socket or one made of wire. I played around with a lot of different sketches before that phrase “keep it simple” rang out in my head again. So I abandoned all those big plans and instead crocheted a simple eye.
It’s really just a ball – good thing I had mastered that shape already! I started with black for the pupil and worked out with blue for the iris, then finished it off with white.
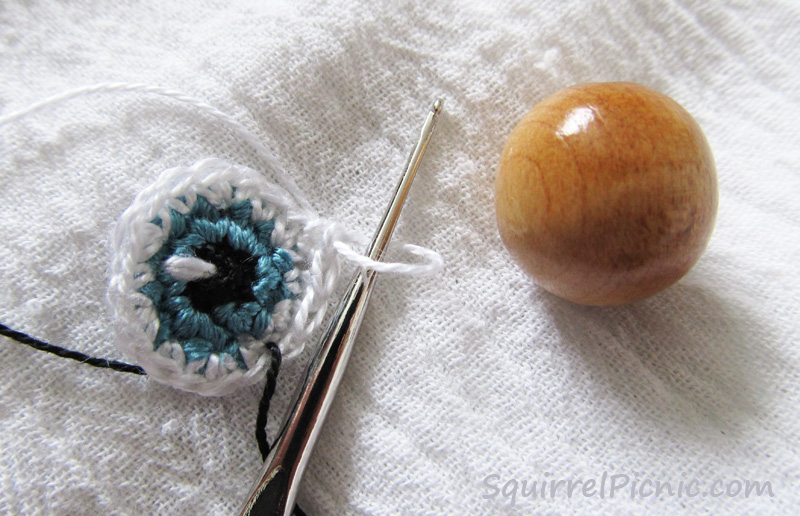 When I was about halfway through crocheting the eye, I inserted the bead and placed a headpin through the bead hole to make sure that I would know where it was when I got to the jewelry-making part. Then I finished crocheting around the bead, decreasing each round until it was enclosed.
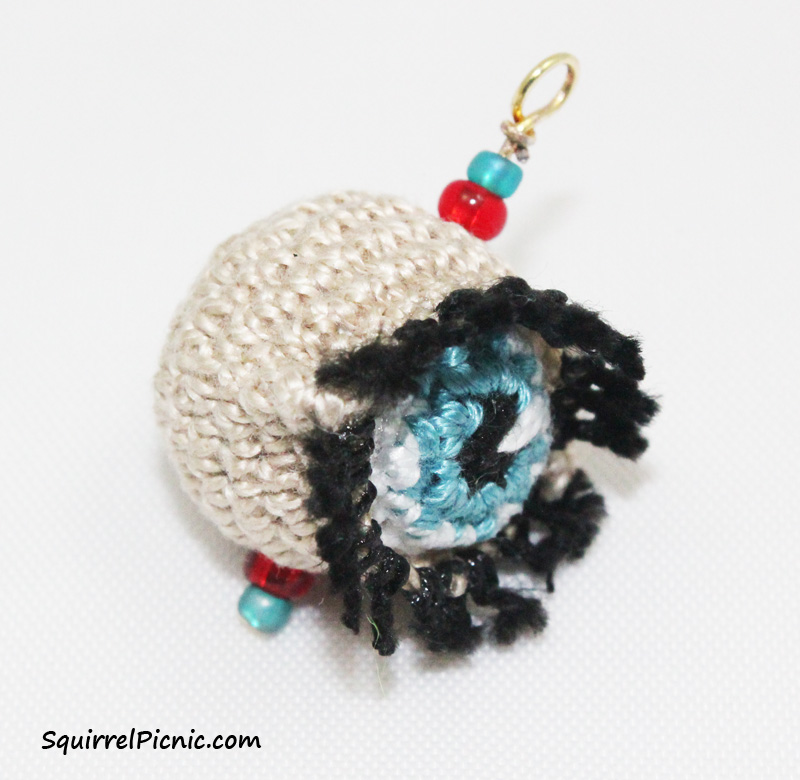
 For the “eyelid socket,” I crocheted another, larger ball but fastened it off about halfway through. I placed the eyeball inside this lidded socket and sewed it in place.
I cut several lengths of black crochet thread, doubled up each one and tied them to the outer round of eyelid stitches. These I touched with superglue so they would stay in place.
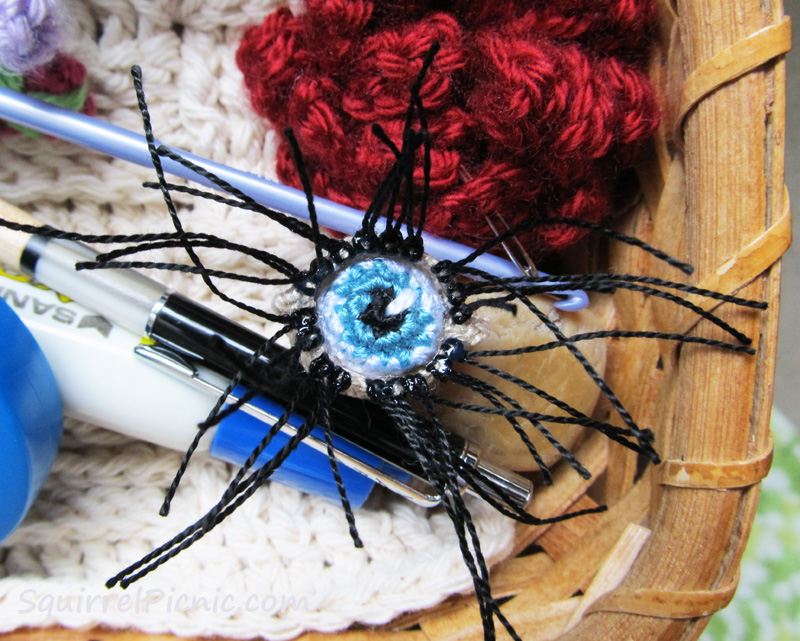 After the glue dried, I trimmed off the excess thread and the eyeball was ready to be made into a charm.
Charm #9: Heart for Sylvie’s “Eye Adore You” Necklace
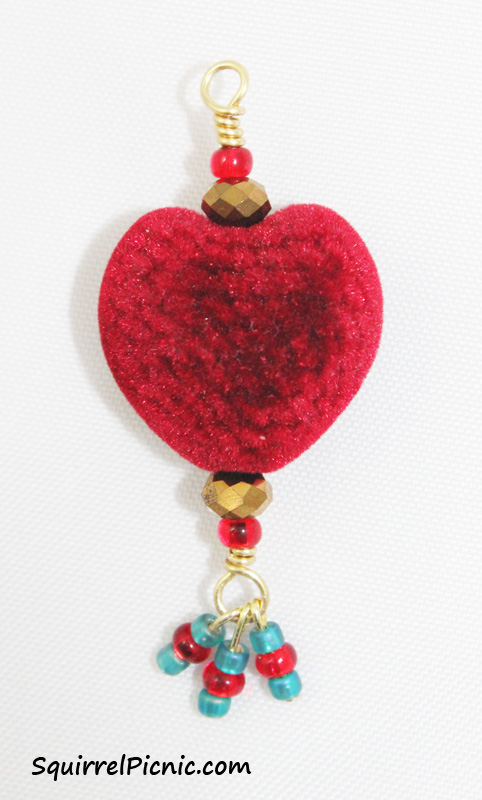 For this charm, I decided to treat myself by hanging up my crochet hooks and digging into my bead box. I found this velvet heart and immediately thought of Sylvie. This charm was a lot of fun to make, and I realized that as much as I enjoy the final outcome of crocheting these charms, I still find them to be a challenge.
You’re probably thinking “Sounds like you need more practice.” And I agree, you are right. I will definitely be picking it up again. I’ve found a lot of benefits to having worked with this scale. It has boosted my confidence with crochet overall, opened the doors to a whole new world of possibilities for future projects, and made me really appreciate all those fingertip-sized crochet animals I see all over the Internet.
Are you considering crocheting on a tiny scale, perhaps making a charm like any of those I’ve made for our charm exchange? Now that I have a year’s experience under my belt, I thought I might share with you some advice – because the biggest thing I learned about crocheting on a tiny scale is that it was nothing like what I expected!
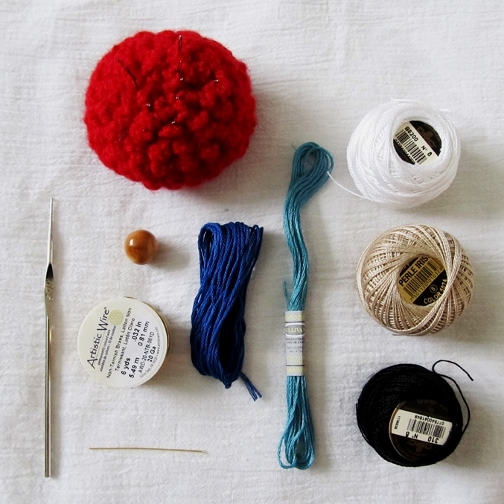
1. Gather your materials. Crochet thread, steel crochet hooks, needles, jewelry-making tools and supplies, magnifying glass, and a superior light source. Crochet thread is numbered by thickness, and the larger the number, the thinner the thread (weird, huh?). The same is true for steel crochet hooks: the larger the number, the smaller the hook. Also, note that while you can crochet with anything from embroidery thread to sewing thread, it will be easier if you work with crochet thread as it is made specifically for this purpose. In fact, if this is your first time, you might want to consider trying the pattern first with the weight of yarn you are most used to and working down in weight until you get to crochet thread. (See #3)
2. Find a quality lamp. It’s worth investing in a table lamp that provides a clear, bright light under which you will be able to work and see the fine detail clearly. It might also help to work with thread of a lighter color when you start out so that you will be able to clearly see the stitches.
3. Find a good pattern. For your first time, I’d recommend crocheting a flat motif like my starfish. If you find this difficult, try it with heavier yarn. Then try it again with a lighter-weight yarn and again until you are working with crochet thread. This way you ease yourself and your hands into the task.
4. Take care of your hands. Tiny crochet requires the muscles of your hands to work extra hard, so you may experience hand pain from time to time. Whenever my hands start to tense up, I find it helpful to take a break to do a few hand and wrist stretches like these offered by Kathryn of Crochet Concupiscence.
5. Take your time. Crocheting tiny takes patience. If you find yourself getting frustrated, put your work aside, and go do something else for a while or even put it away for a day or two. Your work and your nerves will benefit from a fresh perspective.
6. Have fun. Trying out something new always brings ups and downs, but paying attention to the aspects of the new project that you really love will help you crochet it with a smile on your face.
I wish you lots of crochet luck and I look forward to seeing your tiny crochet. Would you please share them? We would love to see each and every one. Tiny crochet is worth bragging about!
Join us next week when I reveal all of our finished necklaces and bracelets from this charm exchange.
Check out previous posts in this series:
Charm Exchange Part 4: Community
Charm Exchange: The Teeny Tiny Crochet Continues
Charm Exchange Part 3: Coming Together
Charm Exchange Part 2: Working on a Small Scale Poses a Big Challenge
Charm Exchange: Make Jewelry, Make Friends
Itty Bitty, Teeny Weeny Crochet


May 8, 2015 at 11:01 am
I can see where miniature crochet can be fulfilling AND aggravating. I personally think you did a great job on ALL of the tiny gems that you’ve made! LOVE them!
May 10, 2015 at 12:47 pm
That is very sweet of you. Thank you so much! It has been a labor of love. 🙂 Happy Mother’s Day to you!
May 8, 2015 at 11:30 am
Fantastic! I particularly love the dolls. Sharon x
May 10, 2015 at 12:48 pm
Thanks, Sharon! They were really fun to make.
May 8, 2015 at 6:43 pm
lovely teeny crochet. Good advice re exercises too! the eyeball is great! ❤
May 10, 2015 at 12:48 pm
Thanks, Sharon! Those exercises have saved my hands a number of times. Enjoy!