 For Make It! Challenge #6, Ranee Galambos challenged me to make a purse inspired by her favorite pet, a Jack Russell terrier named Nina.
“I loved her energy, devotion, intelligence and her company. She was the most amazing dog I ever owned and always made me laugh at her craziness,” Ranee said.
It was my pleasure to design this clutch inspired by such a wonderful furry friend.
I was excited to start this project because I knew it would be a great opportunity to try my hand at felting. I did some research and asked tons of questions, and now I’m ready to tell you all about this very fun and interesting technique that will make your clutch soft and cuddly as well as beautiful.
First, I stopped by my local yarn shop to hear what the experts had to say. When I went straight to the bright white wool, they stopped me and graciously advised that you shouldn’t use bleached white wool for felting because the bleaching process has damaged the fibers. Also superwash or washable wool will not felt. The higher the wool content, the better felted the final piece will be.
More helpful advice came from Kiki and Steven of Luscious Gracious. I recommend checking out their “Murphy’s Laws of Felting,” which provides pretty much everything you need to know. Most importantly, I learned that in felting, a knitted piece will shrink more in height than it does in width. With this in mind, I made a swatch first and recorded the size before and after washing it three times in a top-loading washing machine set to “Whites.” Would you believe that my swatch shrank 20% horizontally and 45% vertically? It made me really glad that I had taken the time to do this test! Designing the pattern 20% wider and 45% taller was a little tricky and the dog that I knit does look a little wonky, but thankfully the dog I pulled out of the final wash had shrunk to the exact size I had anticipated.
Therefore, the best advice I have for you is to make a swatch and wash it in the same manner that you will use to wash the clutch. Record the setting you use and the number of washes it takes to get the level of felting you desire. Then use that information to guide you at the felting stage, because even if you use the same yarn I have used, you’ll most certainly have a better washing machine than the ancient one I used in the basement of our apartment. Most likely yours will take less than three washes!
Jack Russell Clutch
Finished size (after felting):
14″ wide by 5 1/4″ tall
Materials:
1 skein Cascade Yarn 100% Peruvian Highland Wool in Natural (100 grams / 220 yards)
Small amount Cascade Yarn 100% Peruvian Highland Wool in Black or Brown (100 grams / 220 yards) (optional)
Size 8 circular knitting needles
Tapestry needle
Pillowcase
Black felt
Brown felt
1/2″ safety animal eyes
3/4″ black button for nose (La Mode 2067)
9″ black zipper
22 1/4″ round red beads (Blue Moon Red Glass Beads JAS #1746023)
Dog tag (or zipper pull)
8″ of .254mm nylon invisible cord
1/2 yard cotton fabric for lining
Needle
Thread in brown, black, and white
Sewing machine
Washing machine
Gauge:
16 sts = 4 inches
22 rows = 4 inches
Step 1: Make a swatch!
Although most people say that a gauge swatch isn’t necessary in felting (there’s really no way to accurately predict how much a knitted piece will felt), I still recommend knitting and washing a test swatch.
I suggest working an open-backed swatch because this pattern includes knitting flat and in the round. Cast on 20 stitches. After knitting each row, push the sts around the cable to the other needle and carry the yarn very loosely across the back so that you can continue to knit each row on the right side. Knit 27 rows.
Place your swatch into a pillowcase. Tie the end in a knot, throw it in the washing machine, and add your usual detergent (don’t add any fabric softener). Set your washing machine to the smallest load setting, the roughest agitation, and a hot wash cycle, and start the machine.
Be sure to record any notes about the settings used and number of cycles it took to felt your swatch.
Step 2: Knit the clutch
Body
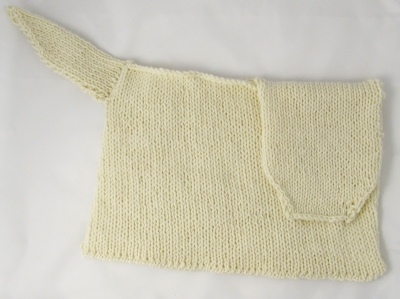
CO 96 sts and join. Knit each round until the fabric measures 9 inches.
Head
BO 72 (24)
Row 1: k
Row 2: k1, p22, k1
Rows 3-26: repeat rows 1 and 2
Row 27: k1, ssk, k18, k2tog, k1 (22)
Row 28: k1, p20, k1
Row 29: k1, ssk, k16, k2tog, k1 (20)
Row 30: k1, p18, k1
Row 31: k1, ssk, k14, k2tog, k1 (18)
Row 32: k1, p16, k1
Row 33: k1, ssk, k12, k2tog, k1 (16)
Row 34: k1, p14, k1
Row 35: k1, ssk, k10, k2tog, k1 (14)
Row 36: k1, p12, k1
BO and weave in ends.
Sew bottom edges together.
Ears
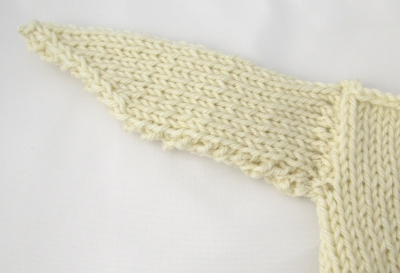
With your choice of black, brown, or white yarn, CO 12 sts on the circular needles you used for the body or size 8 straight needles if you prefer.
Row 1: k
Row 2: k1, p10, k1
Repeat rows 1 and 2 until the ear is 2 1/2” long.
Row 3: k1, ssk, k6, k2tog, k1 (10)
Row 4: k1, p8, k1
Row 5: k1, ssk, k4, k2tog, k1 (8)
Row 6: k1, p6, k1
Row 7: k1, ssk, k2, k2tog, k1 (6)
Row 8: k1, p4, k1
BO and weave in ends.
Repeat for second ear, using the color of your choice.
Tail
With white yarn, CO 18 sts.
Row 1: k
Row 2: p
Repeat rows 1-2 until the tail is 3” long.
Row 3: K1, ssk, k12, k2tog, k1 (16)
Row 4: k1, p14, k1
Row 5: K1, ssk, k10, k2tog, k1 (14)
Row 6: k1, p12, k1
Row 7: k1, ssk, k8, k2tog, k1 (12)
Row 8: k1, p10, k1
Row 3: K1, ssk, k6, k2tog, k1 (10)
Row 4: k1, p8, k1
Row 5: K1, ssk, k4, k2tog, k1 (8)
Row 6: k1, p6, k1
Row 7: k1, ssk, k2, k2tog, k1 (6)
Row 8: k1, p4, k1
BO, leaving long tail for sewing
Fold tail in half lengthwise with WS together. Sew up along edge, and sew to the clutch.
Step 3: Felt the clutch
Place your clutch and ears into a pillowcase. Tie the end in a knot, throw it in the washing machine, and add your usual detergent (don’t add any fabric softener). Set your washing machine to the same setting you used for your swatch, and start the machine. Pull out the pillowcase with tongs every 10 minutes or so and check the clutch to make sure the insides aren’t sticking together. If they are, just pull the sides apart.
Some knitters recommend adding other clothes to the wash to increase agitation. I didn’t do this and it seemed to work fine. Maybe next time I’ll try it that way and see if it will take less washes to reach the desired felting.
It took me 3 washes to get the clutch to the level of felting I desired and to the size I had anticipated it would shrink to. It may take more or less, depending on your machine.
Reshape the clutch and ears and lay them on a towel to dry.
Step 4: While waiting for clutch to dry, sew bag lining
- Cut out your liner fabric into four equal pieces measuring 10” by 5 1/2”. (We will use a 1/2” seam allowance all the way around.)

- Place the outer fabric face up and lay the zipper face down on top.

- Place the lining fabric face down on the zipper, line up the edges, and pin all three layers together. Sew together along the zipper using a zipper foot. Press.

- Place another piece of outer fabric face up and lay the zipper face down on top again. Place the lining fabric face down on the zipper, line up the edges, and pin all three layers together. Sew together along the zipper like you did before. Press.

- Rearrange pieces so that the right sides of the inner pieces are together and the right sides of the outer pieces are together.

Unfold the outer layers just a bit so that you can unzip the zipper halfway. Refold and pin along the edges. Fold the zipper edges with the outer pieces. - Sew around the edges with a 1/2″ seam, leaving a 2″ opening along one edge. Clip corners and trim end of zipper off.

- Reach inside the 2″ opening and turn the bag right side out.
- Once turned out, pull out the inner pieces and press the 2″ opening seams down. Sew closed with machine or by hand.
- Push the inside back inside and push corners into shape.

Step 5: Sew on embellishments
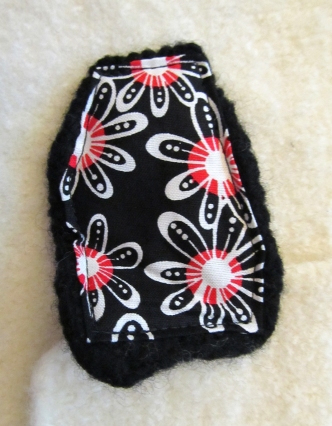
- Trace the shape of the head onto a piece of fabric, leaving an additional 2″ of fabric at the bottom (below the top edge of the clutch). Cut out and put aside.
- Line the ears by tracing the shape of each ear onto fabric. Cut out, press down edges and sew to underside (WS) of ear by machine. Pin ears onto head and tack by hand.

- Place eyes and sew on nose.

- Cut out spots from black and brown pieces of felt. Sew on by hand.

- Thread beads and dog tag onto an 8″ length of invisible cord and attach to either side of dog’s head.

- Tuck the long end of the lining into the clutch and sew the lining onto the WS of the head by hand.

Step 6: Sew bag lining to clutch
Pin the lining to the inside of the clutch. Sew the inside of the felted clutch to the outer layer of the lining using a flat fell stitch.

Voilà!
P.S. Wash your felted clutch the same way that you would an unfelted sweater:
cold water, by hand, mild soap, no agitation, and dry flat.


June 29, 2013 at 11:52 am
Cute!
June 29, 2013 at 3:21 pm
Thanks, Sara Crafts!
June 29, 2013 at 12:00 pm
This is too cute! I’m passing this on to my fashionable friends!
June 29, 2013 at 3:22 pm
Thanks, Juliette! That’s so kind of you.
June 29, 2013 at 7:43 pm
*dies*
June 30, 2013 at 9:06 am
🙂
June 29, 2013 at 9:27 pm
this is such a cute bad.. thank you very much for doing the tutorial..
very well-written.. 😀
June 30, 2013 at 9:06 am
You’re welcome, Wisher! And thanks for your kind words. I’m so glad you enjoyed it.
June 29, 2013 at 10:51 pm
We are the proud owners of a Jack Russel called Jack. We love this. It is great!
June 30, 2013 at 9:05 am
Thanks, gentlestitches! I’m so glad Jack Russell enthusiasts approve. They are the cutest dogs, with such spirited personalities. I want one of my own!
July 1, 2013 at 5:33 am
Ours came from the local lost dogs home and we never had a better dog! Love on legs he is!
June 30, 2013 at 5:35 am
Love him, just a thought, what about a squirrel bag?
June 30, 2013 at 9:01 am
Thanks, Irene! A squirrel bag is a fantastic idea. I can see it now… with a bushy tail!
June 30, 2013 at 9:36 am
🙂 I’ll watch out for that one then !
July 6, 2013 at 7:01 am
Very cute!
August 27, 2016 at 11:47 pm
Nina was a great dog. Her and her friend Tyson were a very happy duo. Thanks for keeping her memory alive.