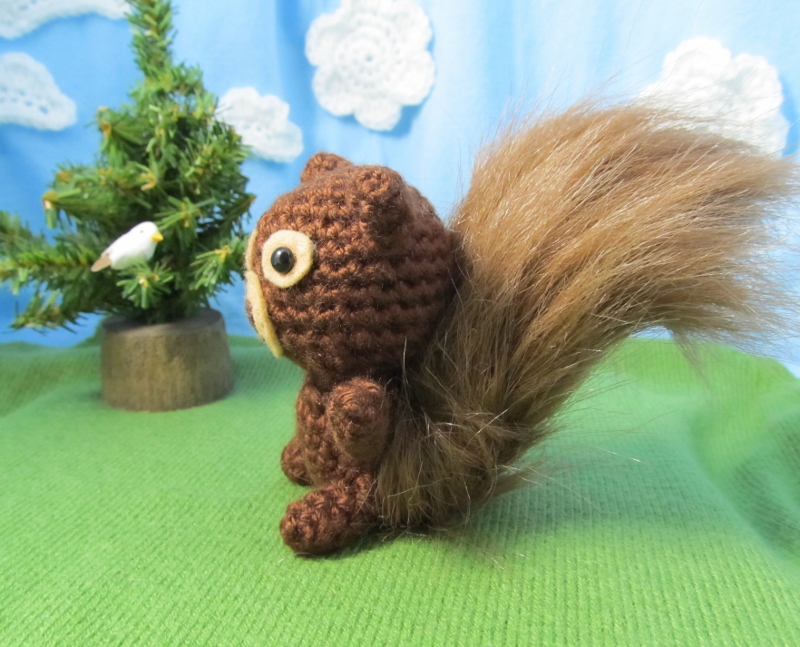
 It’s my opinion that everyone should have a squirrel friend. Now you can make your very own, modeled after Hodge and Podge or the newest resident of Squirrel Picnic, Eric.
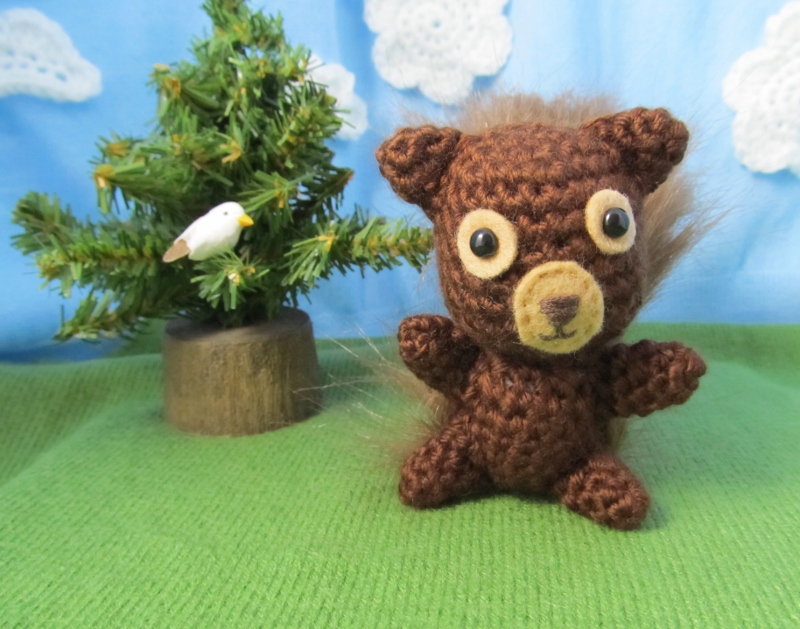
Eric is a bioengineer from NIT (Nut Institute of Technology) who has come all the way to Colorado to genetically modify a tree that will grow the biggest nuts on earth. Even though Hodge and Podge aren’t quite sure what to make of him yet, they know the best way to get to know a new neighbor is to throw him a welcome party.
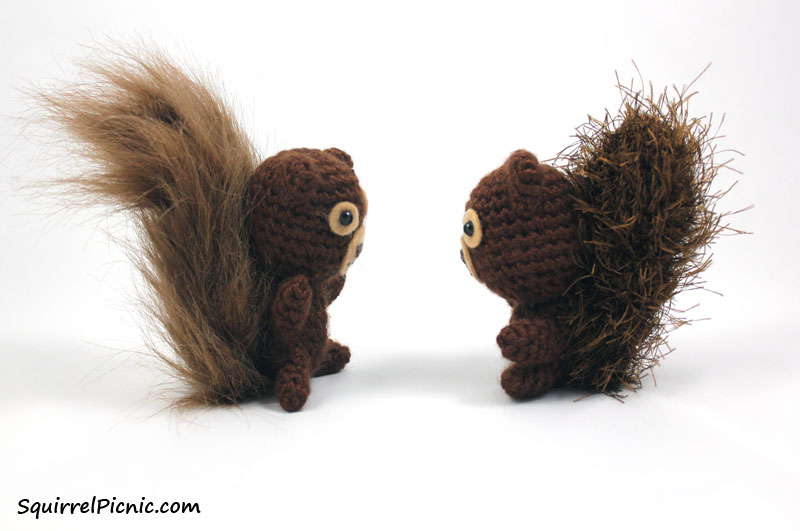
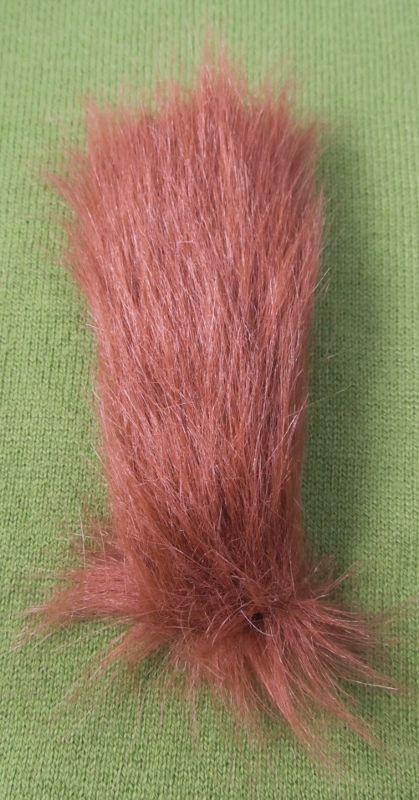
 This pattern includes instructions for two different tail options: a crochet tail and one sewn from faux fur. Hodge and Podge and Eric were made with faux fur tails, but I wanted to offer a crochet option for anyone who might prefer it.
Also, I originally recommended sewing the tail onto the squirrel’s back. But that made it difficult to fit the squirrels with clothing. So I needed to come up with a detachable tail method… because it’s just so much fun to make tiny costumes for them! I came up with the technique of sewing buttons onto the tail and then inserting each button through a stitch in the back of the squirrel’s head or body to attach the tail temporarily. It holds just as firmly as if it were sewn on, and in my opinion, the squirrels seem steadier on their feet this way.
Whichever method you use, I hope you enjoy making a squirrel friend of your very own.
Crochet Your Own Squirrel Friend

Finished size is about 3 1/2″ tall
Materials
Worsted-weight yarn in brown (Caron Simply Soft in Chocolate)
Brown eyelash yarn (Lion Brand Fun Fur in Café)
Polyester fiberfill
Light brown felt
Black or dark brown floss
Light brown thread
Two 1/8″ (5 mm) black buttons for eyes (If making this for a child, please consider embroidering the eyes.)
Size G-6 (4.00 mm) crochet hook
Alternative Faux Fur Tail:
Brown faux fur
Brown thread
Alternative Detachable Tail (for either crochet or faux fur tails):
2 shank buttons, about 1/4″ wide (unlike flat buttons with holes in the top, these buttons have a post at the back that you pass your thread through)
The button size will depend on your gauge. For that reason, I would recommend crocheting the squirrel or a gauge swatch first, and then test out a few buttons to see which size fits comfortably. You want the button to be secure, but you shouldn’t have to struggle too hard to get it in.
Gauge
5 sts = 1″
5 rows = 1″
Abbreviation Note
inc = 2 sc in next sc
dec = sc2tog
Instructions
Head
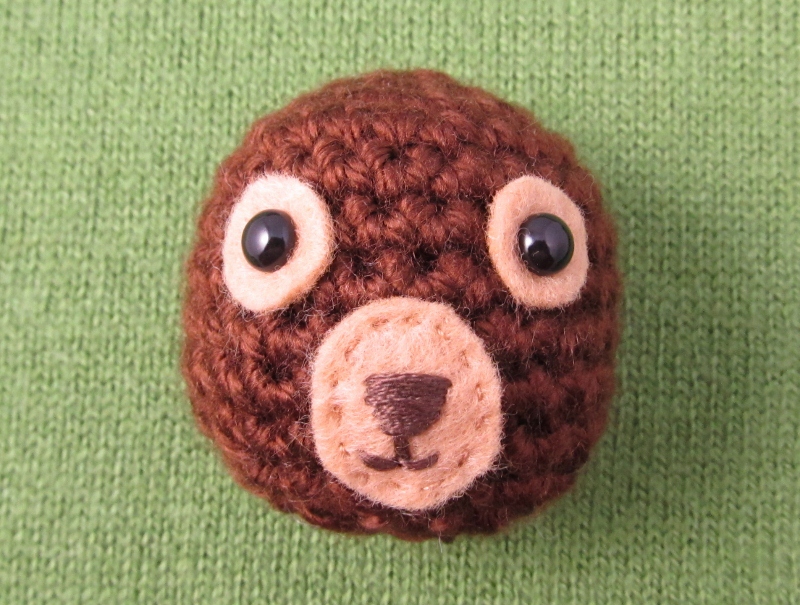
Using brown yarn of your choice, ch 2
Rnd 1: 6 sc in 2nd ch from hook.
Rnd 2: 2 sc in each sc around. (12)
Rnd 3: * Sc, inc, rep from * 5 more times (18)
Rnd 4: * 2 sc, inc, rep from * 5 more times (24)
Rnds 5-10: Sc in ea sc around.
Rnd 11: * 2 sc, dec, rep from * 5 more times. (18)
Rnd 12: * Sc, dec, rep from * 5 more times. (12)
Add a face with my “Safety Eyes with Embroidered Nose and Mouth” tutorial.
Stuff head with fiberfill.
Rnd 13: * Dec, rep from * 5 more times. (6)
FO, leaving a long tail. Thread the tail through the remaining sts and pull to close. Weave in end.
Ears
Make 2
Ch 2
Rnd 1: 4 sc in 2nd ch from hook.
Rnd 2: 2 sc in ea sc around. (8)
Rnd 3: Sc in ea sc around. Join with slst. FO, leaving a long tail, and sew each ear to the head.
Body

Ch 2
Rnd 1: 5 sc in 2nd ch from hook.
Rnd 2: 2 sc in ea sc around. (10)
Rnd 3: * Sc, inc, rep from * 4 more times. (15)
Rnds 4-7: Sc in ea sc around.
Rnd 8: * Sc, dec, rep from * 4 more times. (10)
Stuff body firmly.
Rnd 9: * Sk 1, sc, rep from * 4 more times. (5)
FO, leaving a long tail for sewing.
Sew body to head.
Legs and Arms
Make 2 of each
Ch 2
Rnd 1: 3 sc in 2nd ch from hook.
Rnd 2: 2 sc in ea sc around. (6)
Rnds 3-5: Sc in ea sc around.
FO, leaving a long tail for sewing.
Sew the open end of each appendage to body.
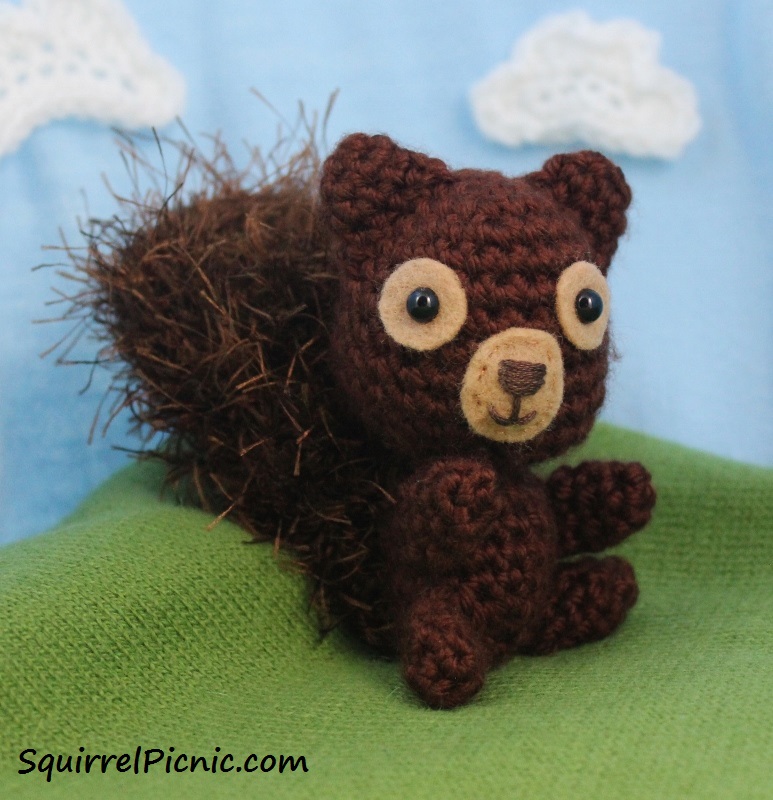
Tail
 With eyelash yarn, ch 2.
Rnd 1: 6 sc in 2nd ch from hook.
Rnd 2: 2 sc in ea sc around. (12)
Rnd 3: * Sc, inc, rep from * 5 more times. (18)
Rnd 4: * 2 sc, inc, rep from * 5 more times. (24)
Rnds 5-8: Sc in ea sc around.
Rnd 9: * 2 sc, dec, rep from * 5 more times. (18)
Rnd 10: * Sc, dec, rep from * 5 more times. (12)
Rnd 11: * Sc, inc, rep from * 5 more times. (18)
Rnds 12-16: Sc in ea sc around.
Rnd 17: * Sc, dec, rep from * 5 more times. (12)
Rnds 18-19: Sc in ea sc around.
Stuff tail lightly.
Rnd 20: * Dec, rep from * 5 more times. (6)
FO, leaving a long tail. Using a yarn needle, thread this tail through the remaining sts and pull tight to close.
At this point, you can choose to sew the tail to the squirrel’s back or jump down to the detachable tail method.

Alternative Faux Fur Tail
Cut a piece of faux fur 4″ wide by 6″ tall.
Fold fabric in half and sew up the bottom and side.
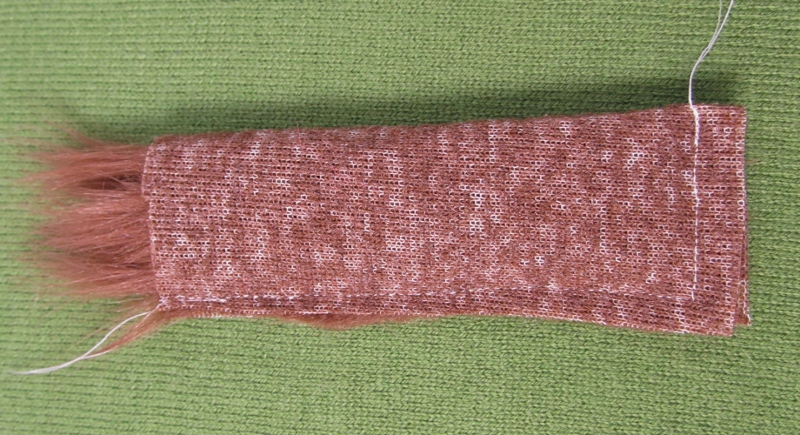
Turn the tail right side out.
Stuff the bottom of the tail with a palm-sized amount of fiberfill and sew the opening at the top closed.
Sew the tail to the squirrel’s bottom and to the back or jump down to the detachable tail method.
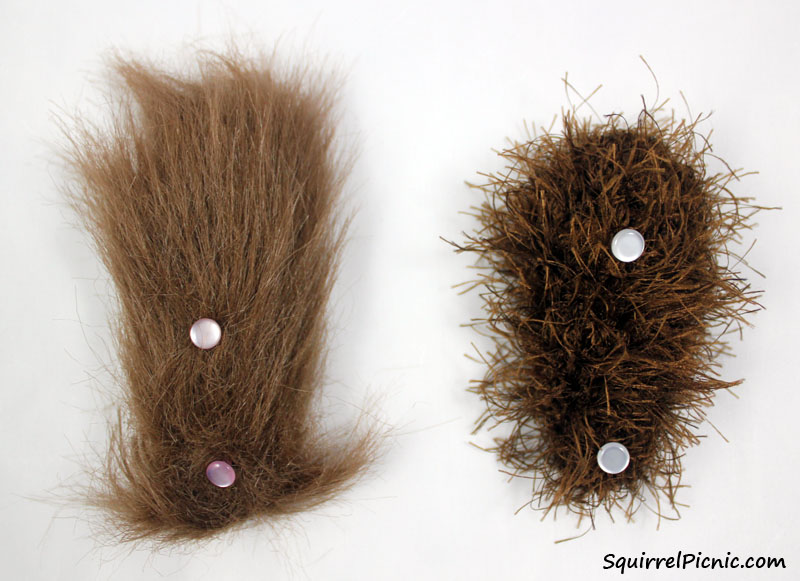
Detachable Tail Method
Make your squirrel’s tail detachable, and you’ll be able to fit him or her with costumes and clothing.
It’s simple! Just sew a shank button about 1″ from the bottom of the tail on the side that will be facing the squirrel’s back. Then sew another button about 1-1 1/2″ above that. The top button will attach the tail to the back of the head. I’d recommend holding the tail up to the squirrel to verify where the button should go before sewing it on.
There’s still one other, even better way to attach your squirrel’s tail. But you’ll have to wait for our first book, The Big Acorn Race, for the detailed tutorial. Coming to Amazon.com and other online stores in March 2016!
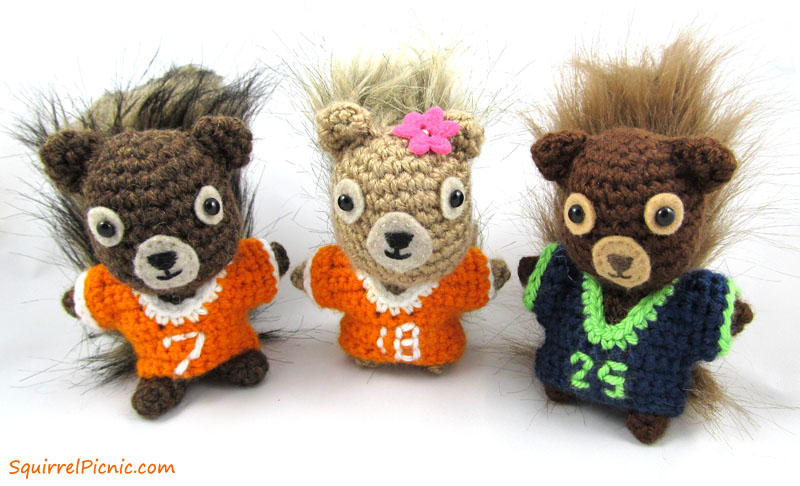
And now you can dress your squirrel in outfits and costumes like these football jerseys! If you hover over “Squirrels” in the menu bar above this article, you will find a whole list of other free patterns for accessories to make for your squirrel friend. Dress them up, have a picnic, and have some fun!


October 30, 2023 at 8:03 pm
You really are doing your best to tempt me to learn how to crochet! If I ever do (it could happen), one of your squirrel pals will be at the very top of my project list : )